Absolutely lovely – inside and out
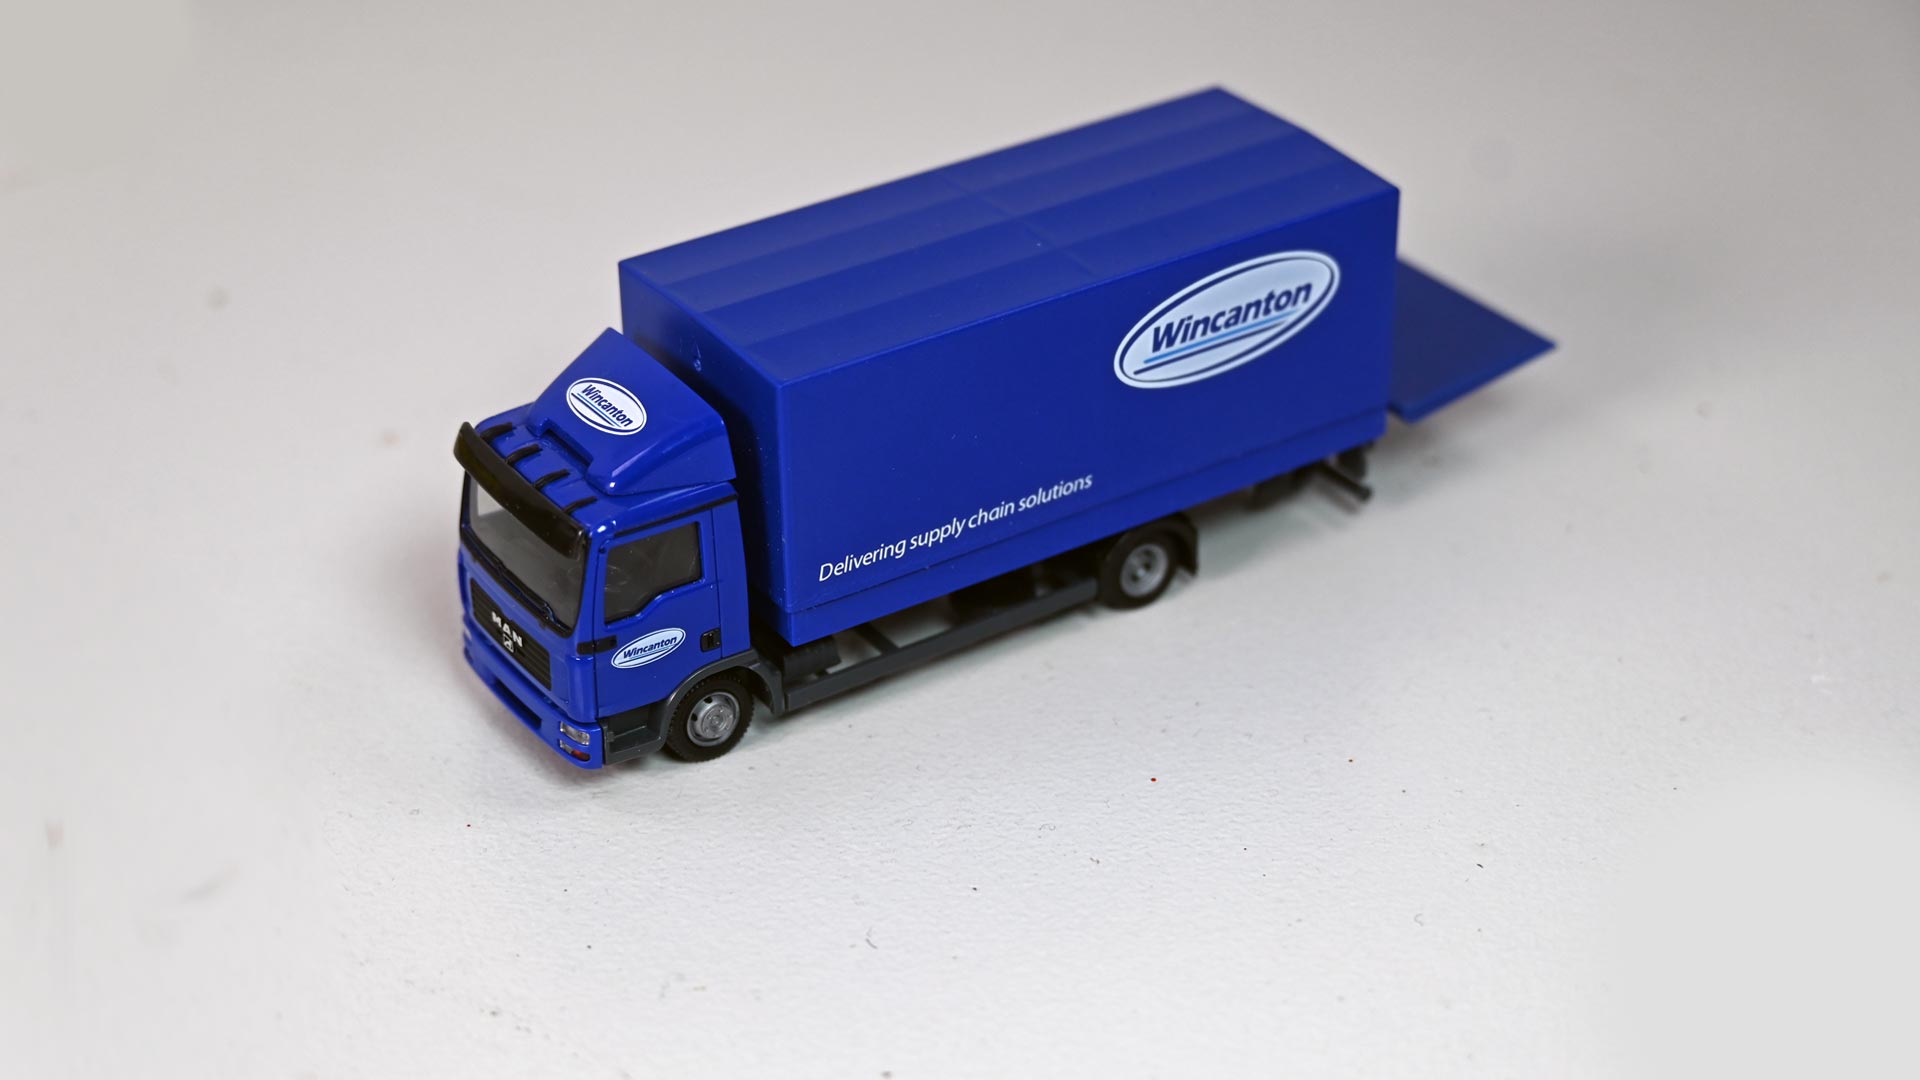
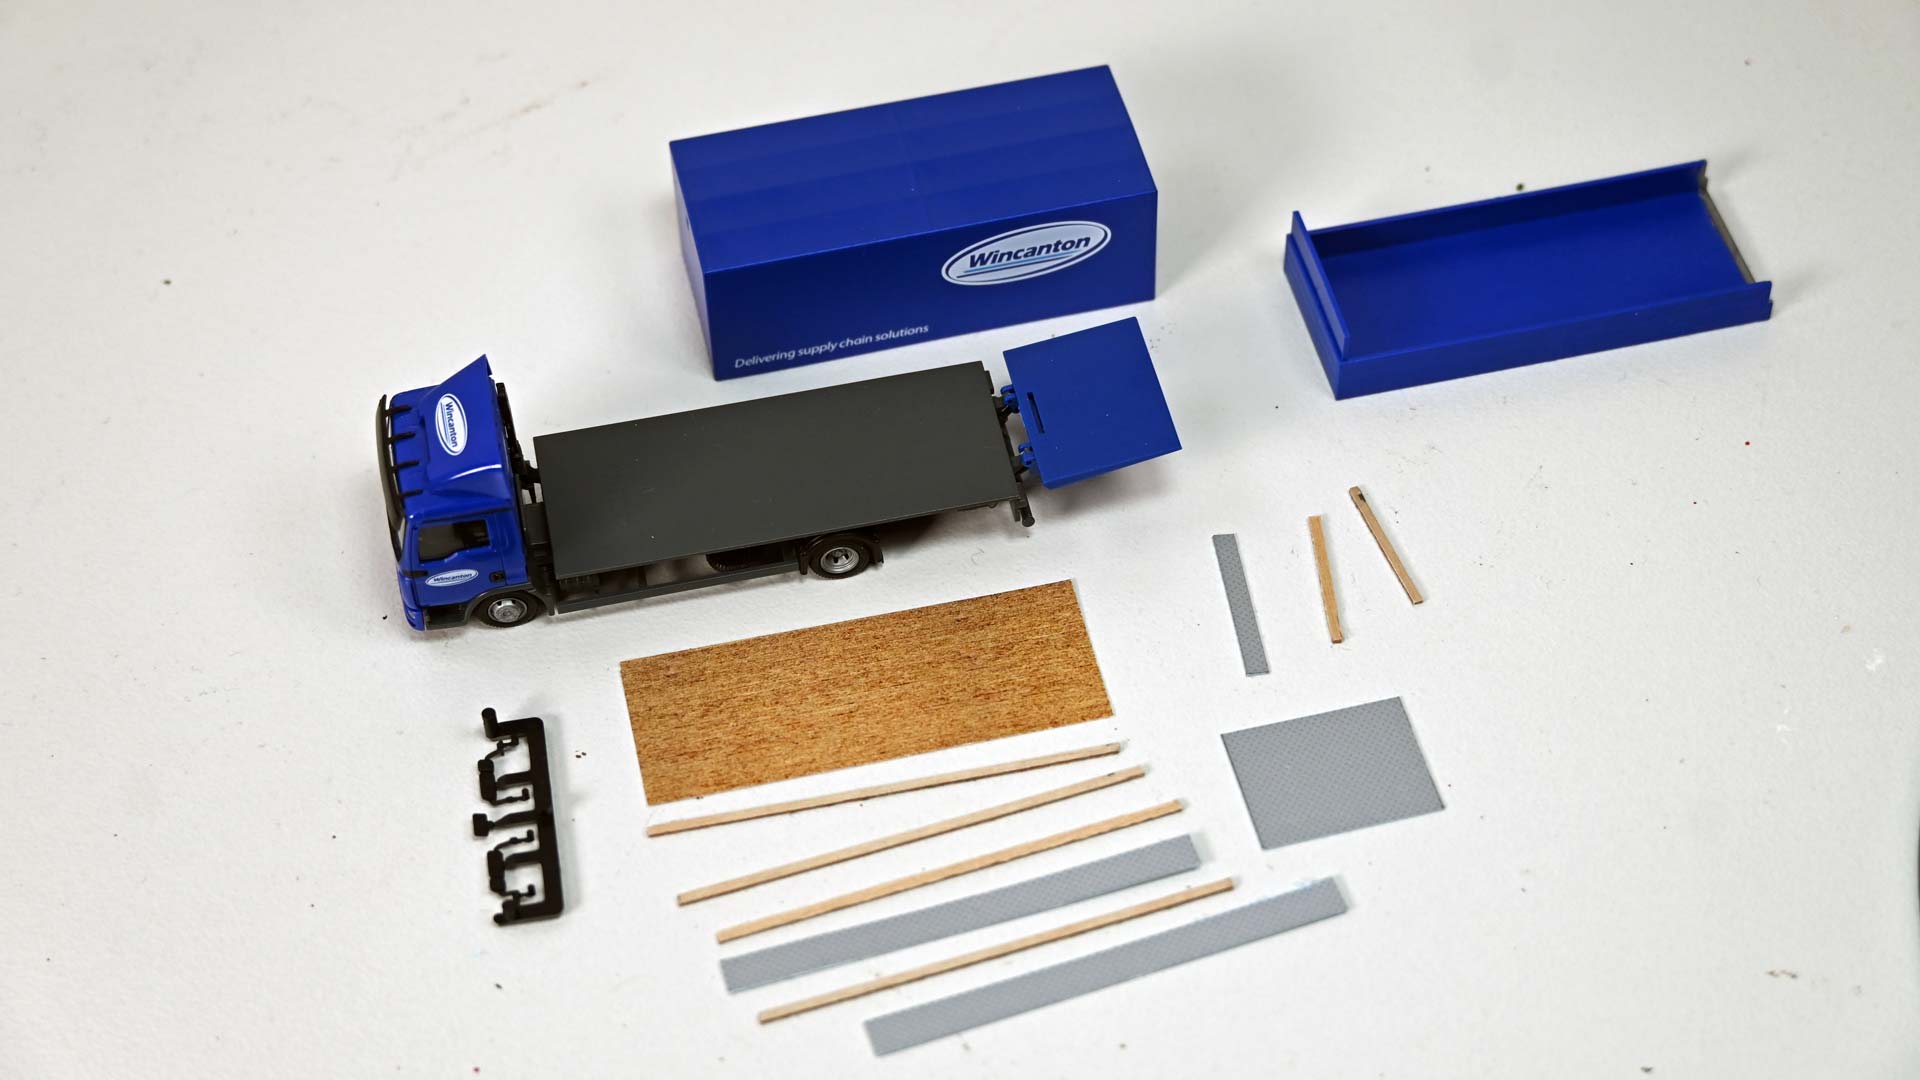
Since 2004, the Herpa range has included box trucks with movable tail lifts. This feature allows interesting loading scenes to be recreated, and not just for model railroaders. The effect of the filigree movable ramps can be further enhanced by taking just a few simple steps and expending the simplest means.
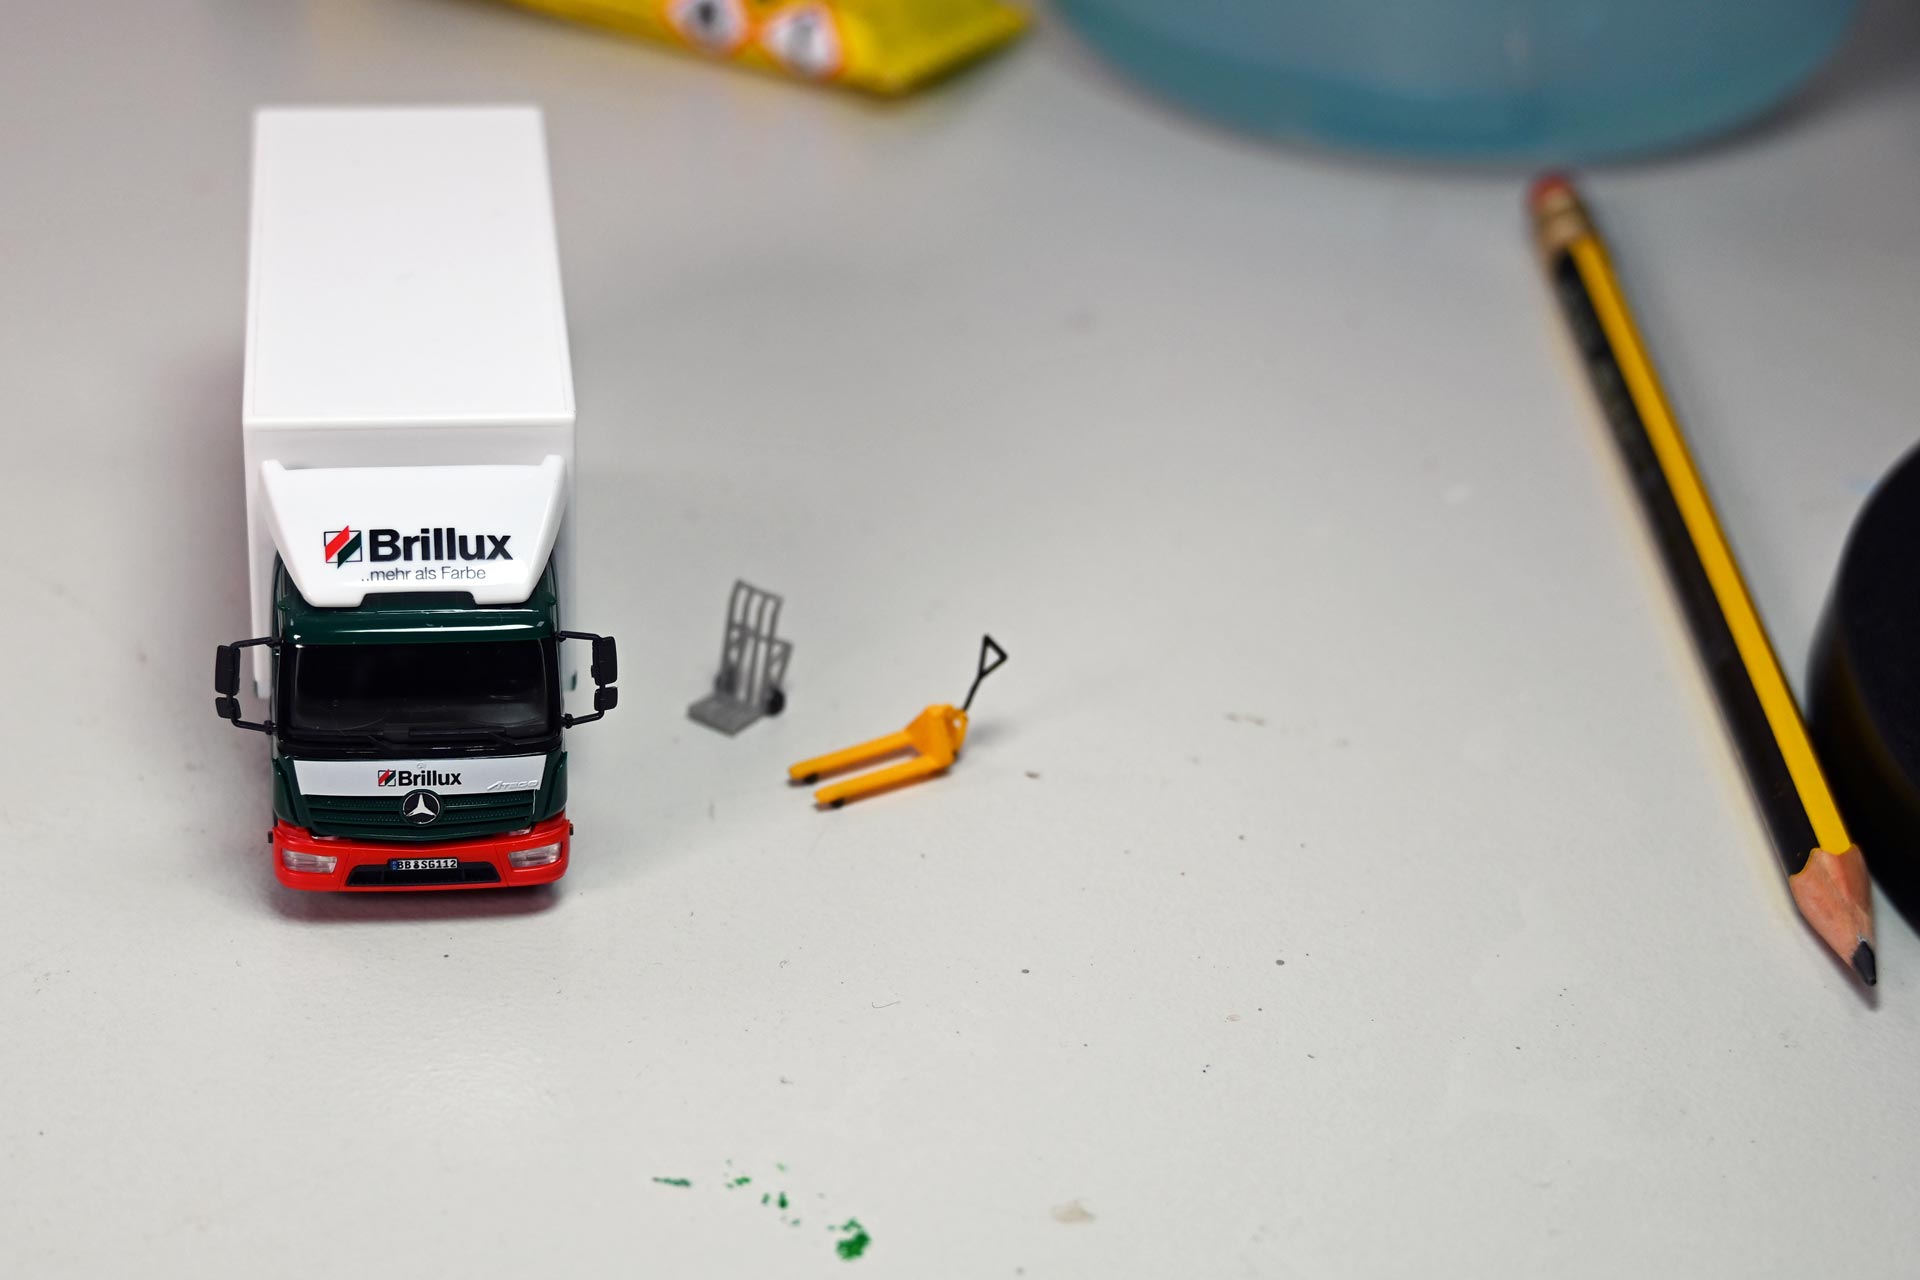
Light trucks are indispensable helpers for many small and medium-sized companies. The small 7.5 or 12-ton trucks are usually equipped with a tail lift to facilitate loading and unloading independently of the loading ramps of the large haulage companies. The light two-axle vehicles are indeed part of the street scene - and are hence ideal for model railroaders to create lively loading scenes.
The design of the loading areas and tail lift on the prototype is determined by pure pragmatism: While the ramp is usually covered with robust and non-slip crow's foot plate, the loading area itself is often only covered with simple multiplex boards. The bases of the side walls are also protected by sheet metal cladding.
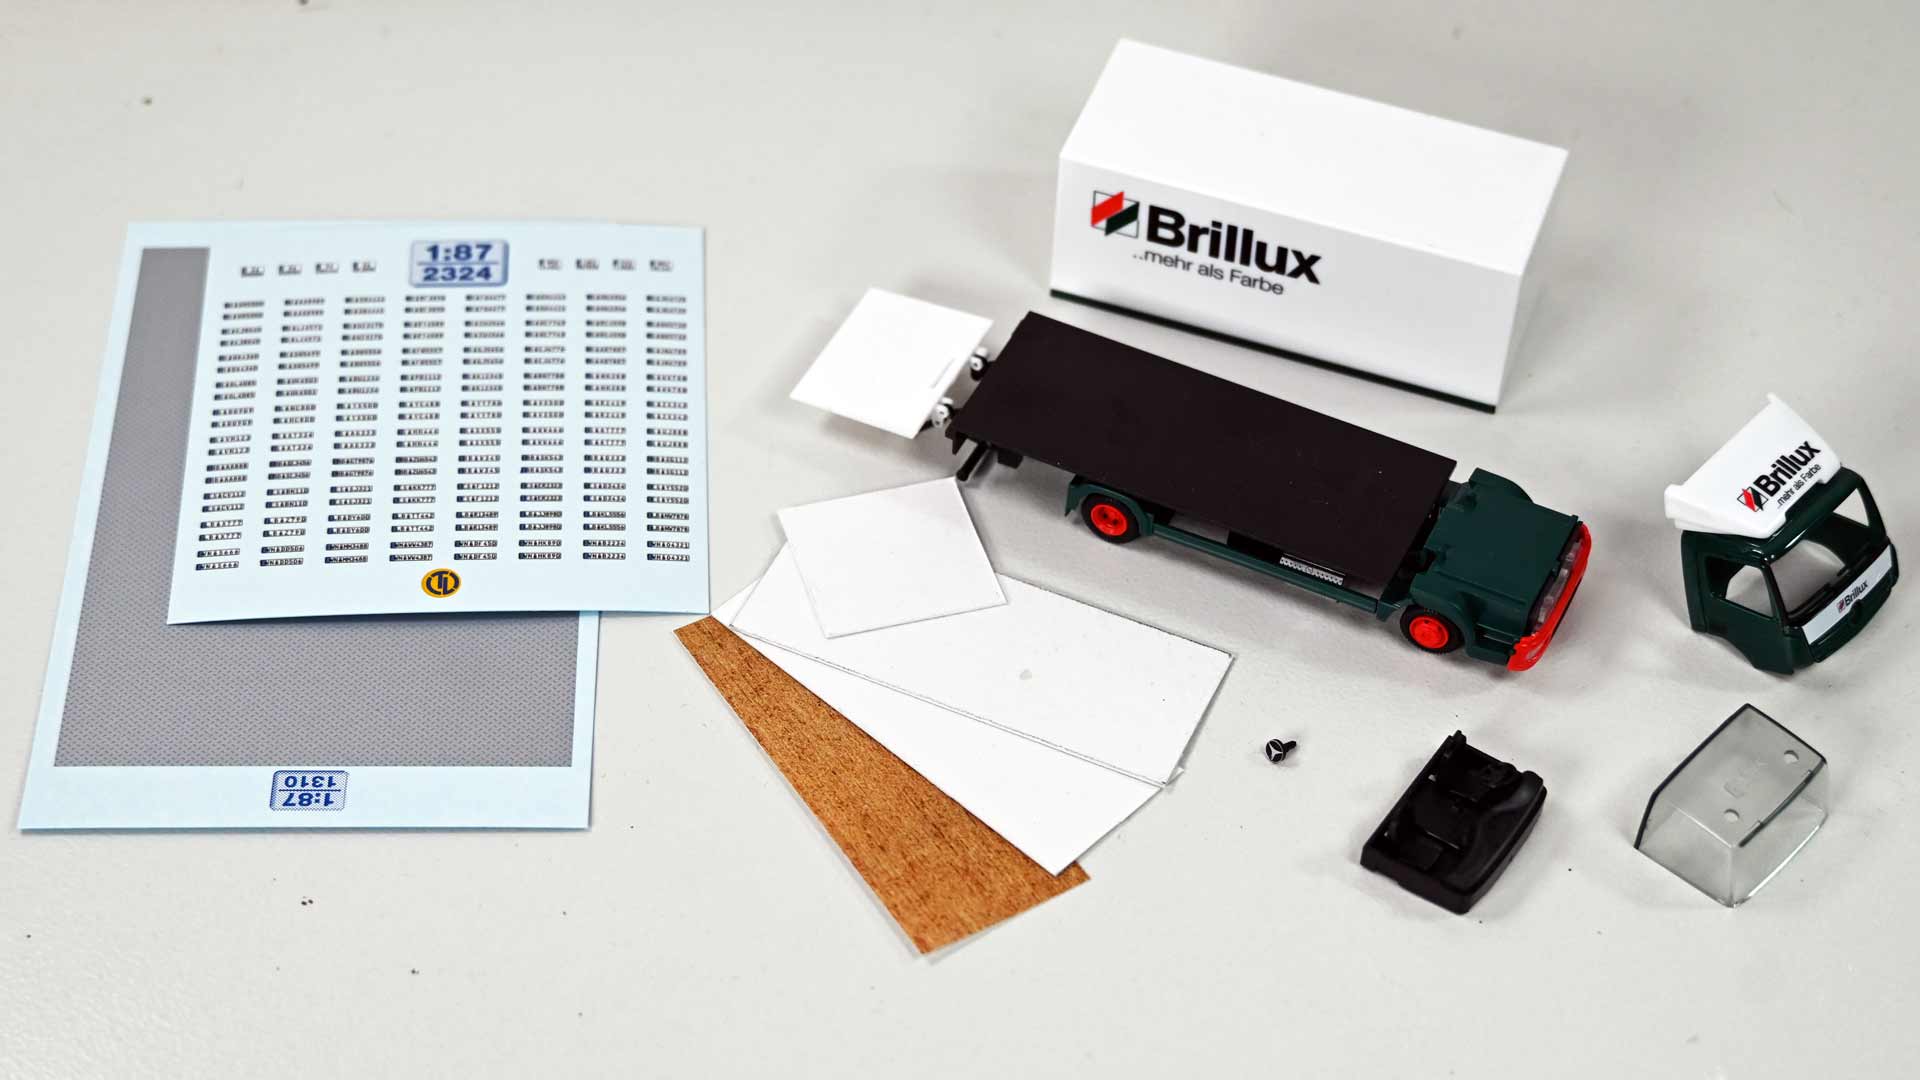
For the realization of the model, the hobbyist first needs a replica of a wooden floor for the loading area as well as checkered panels for the loading ramp and interior walls. Further details, such as wet decals with current vehicle registration plates and paint to highlight details such as tail lights and indicators, complement the list of materials.
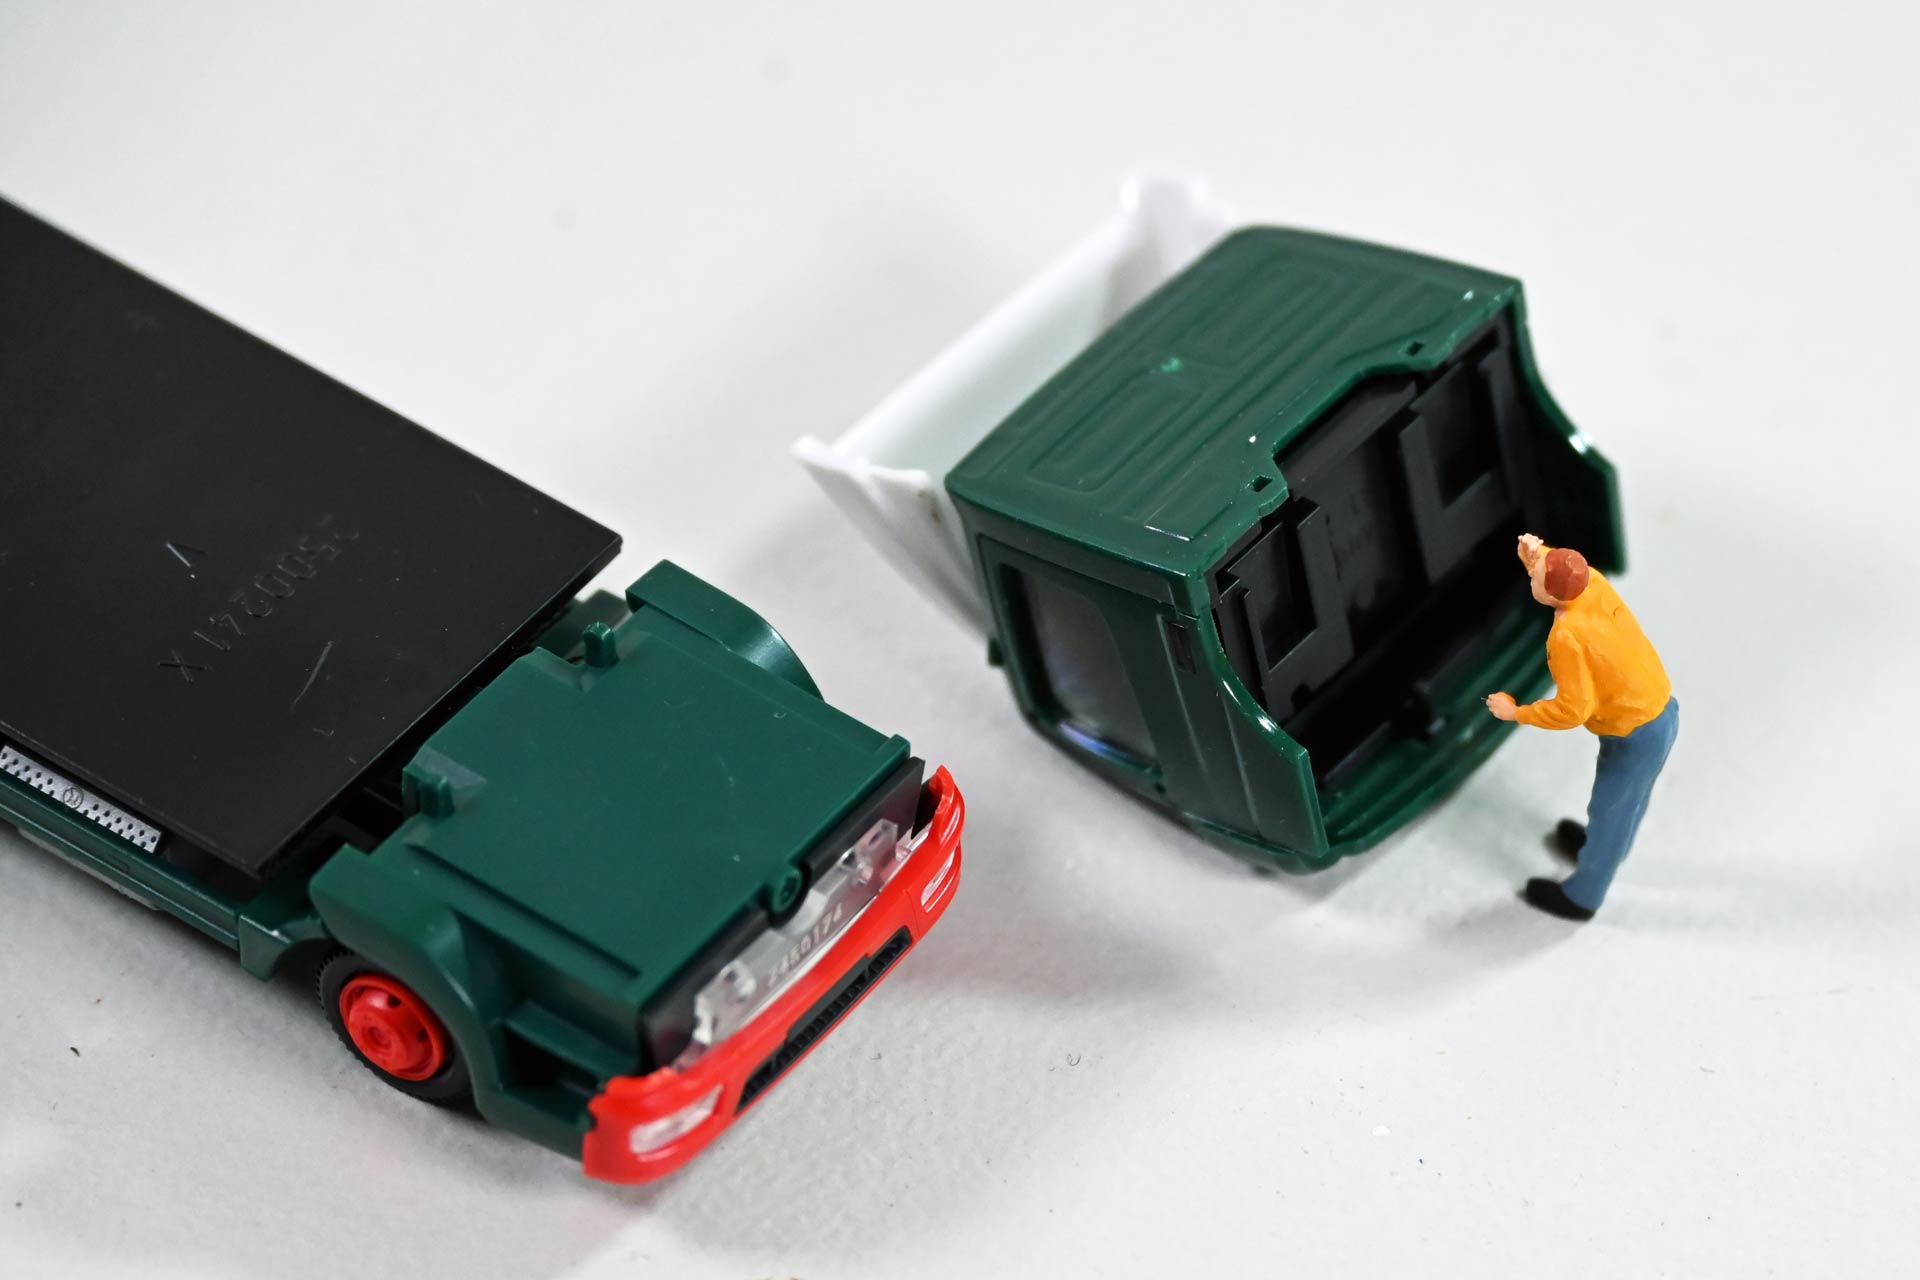
Dismantling the truck
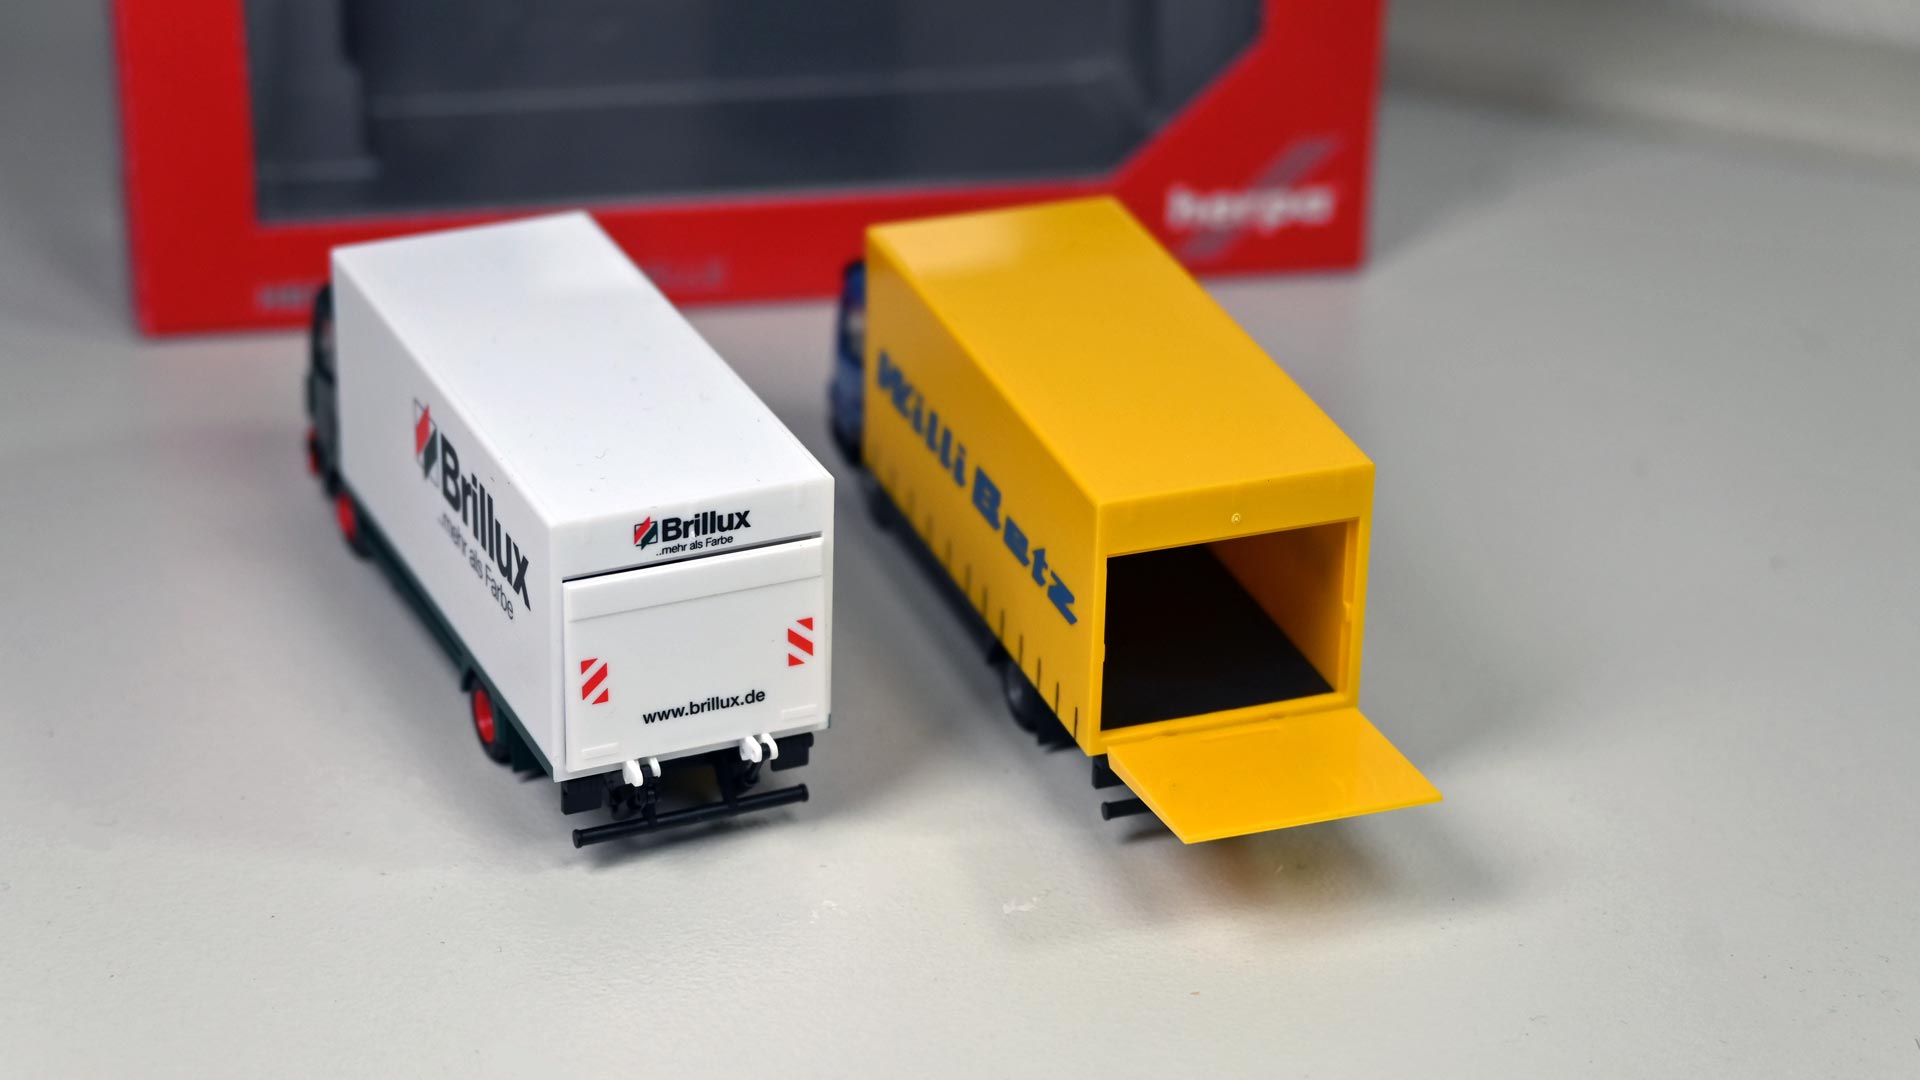
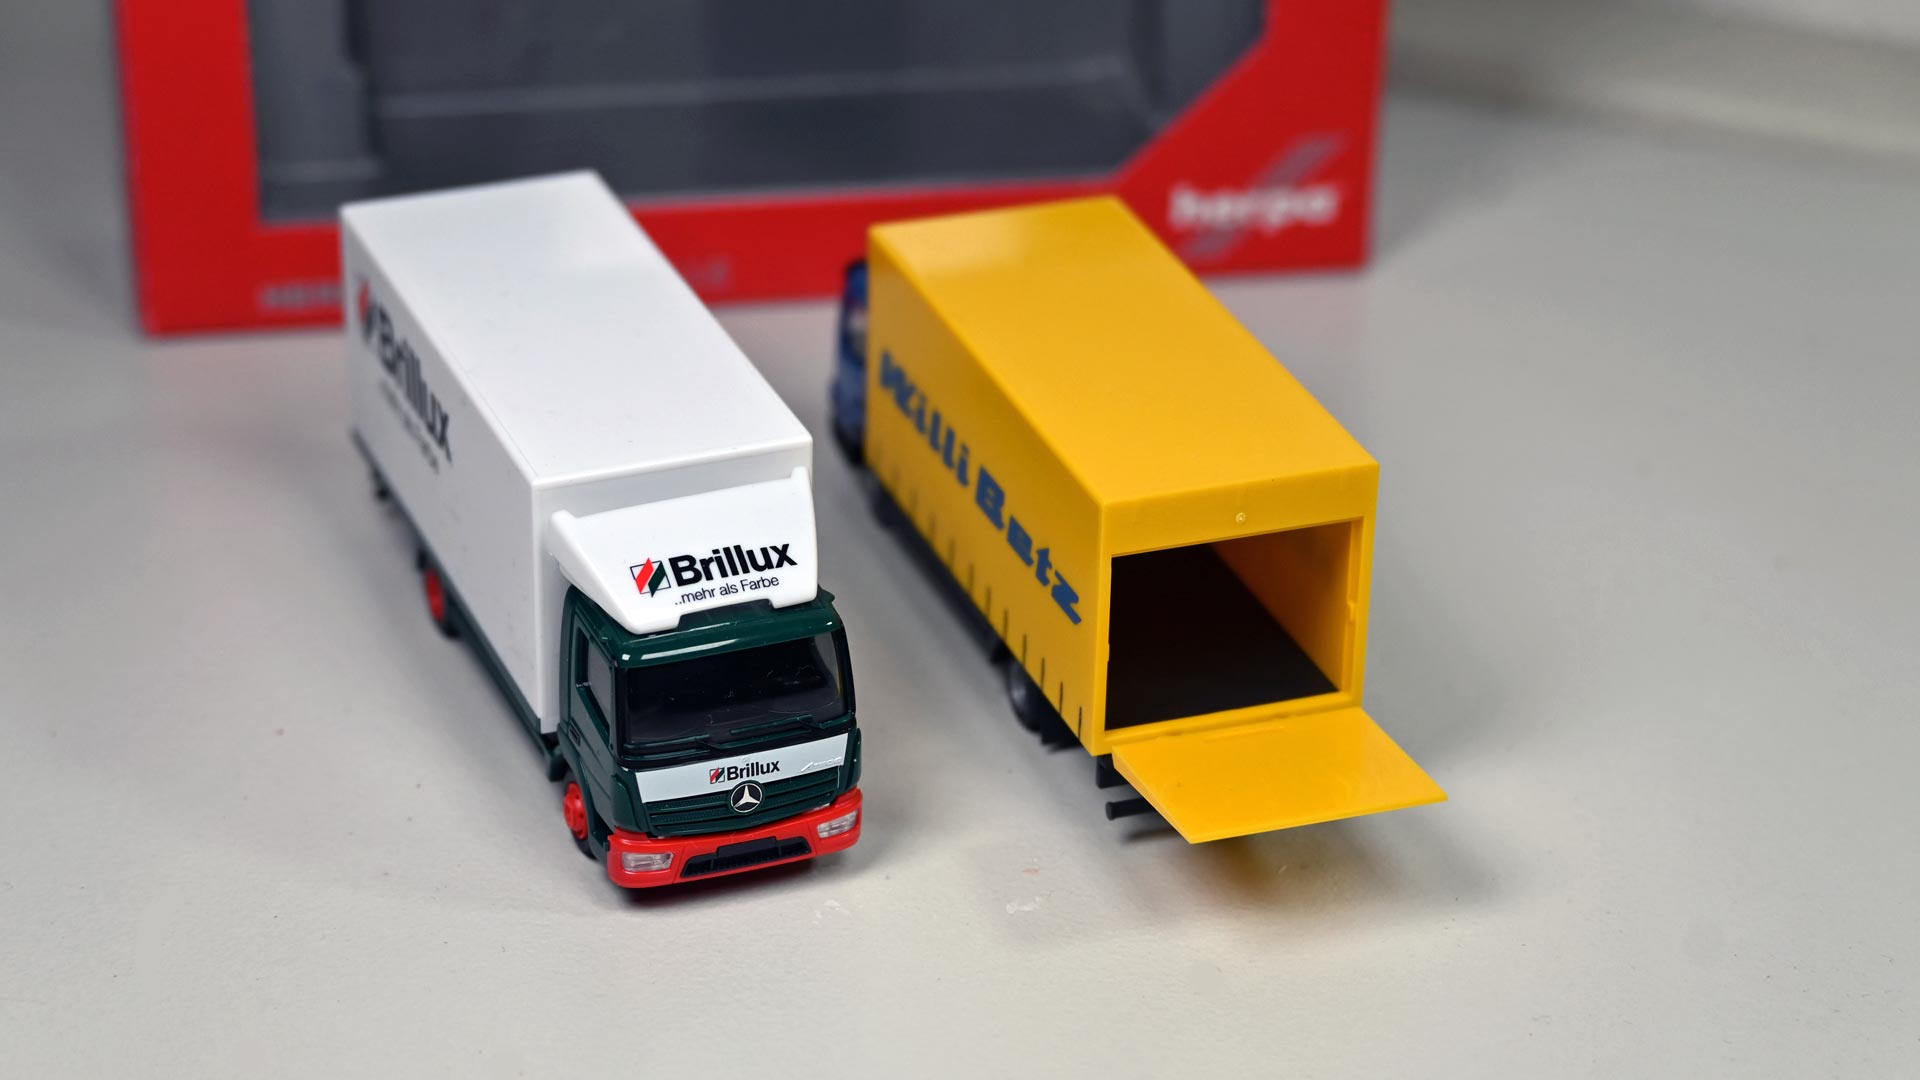
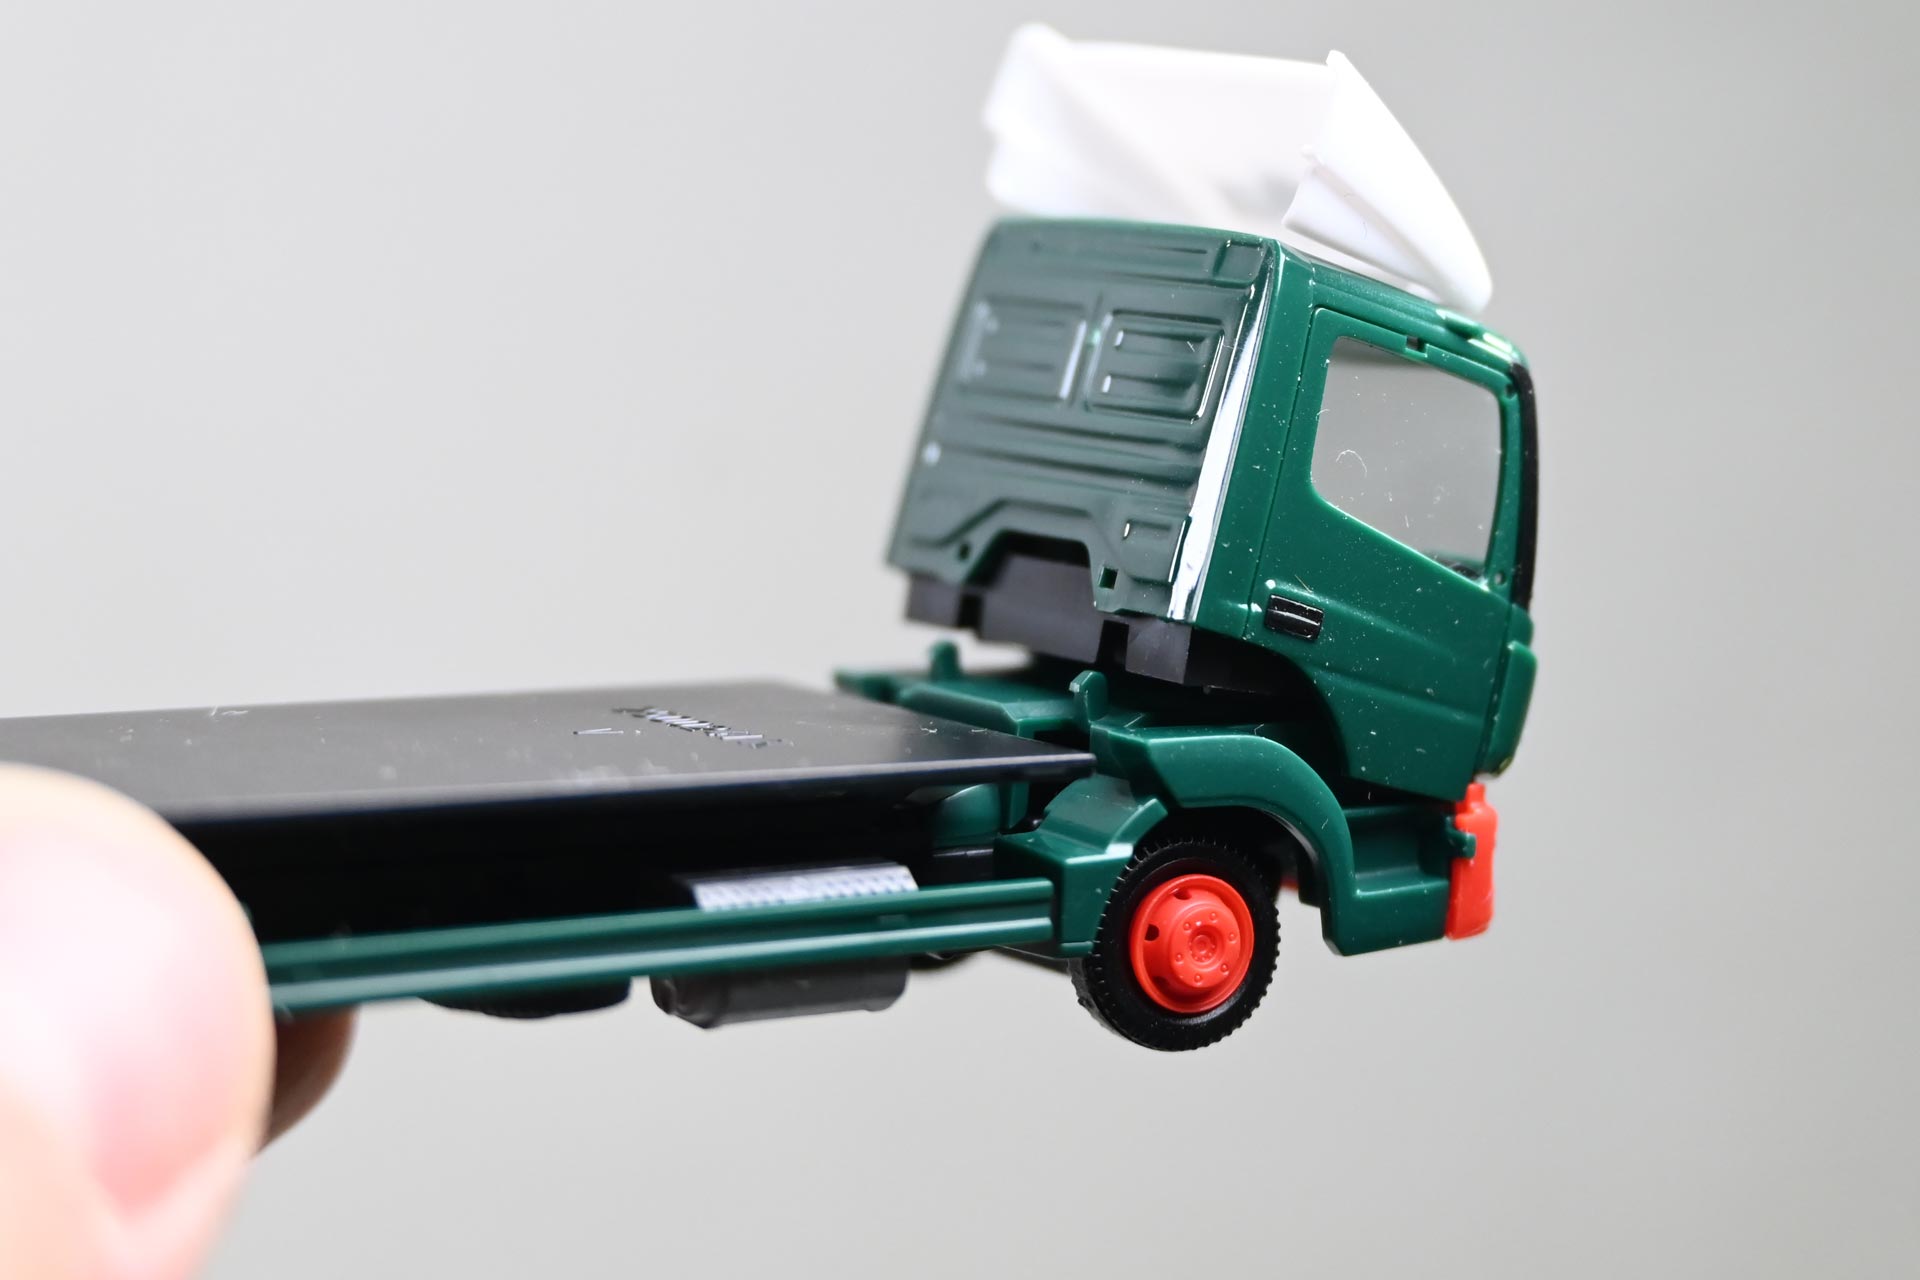
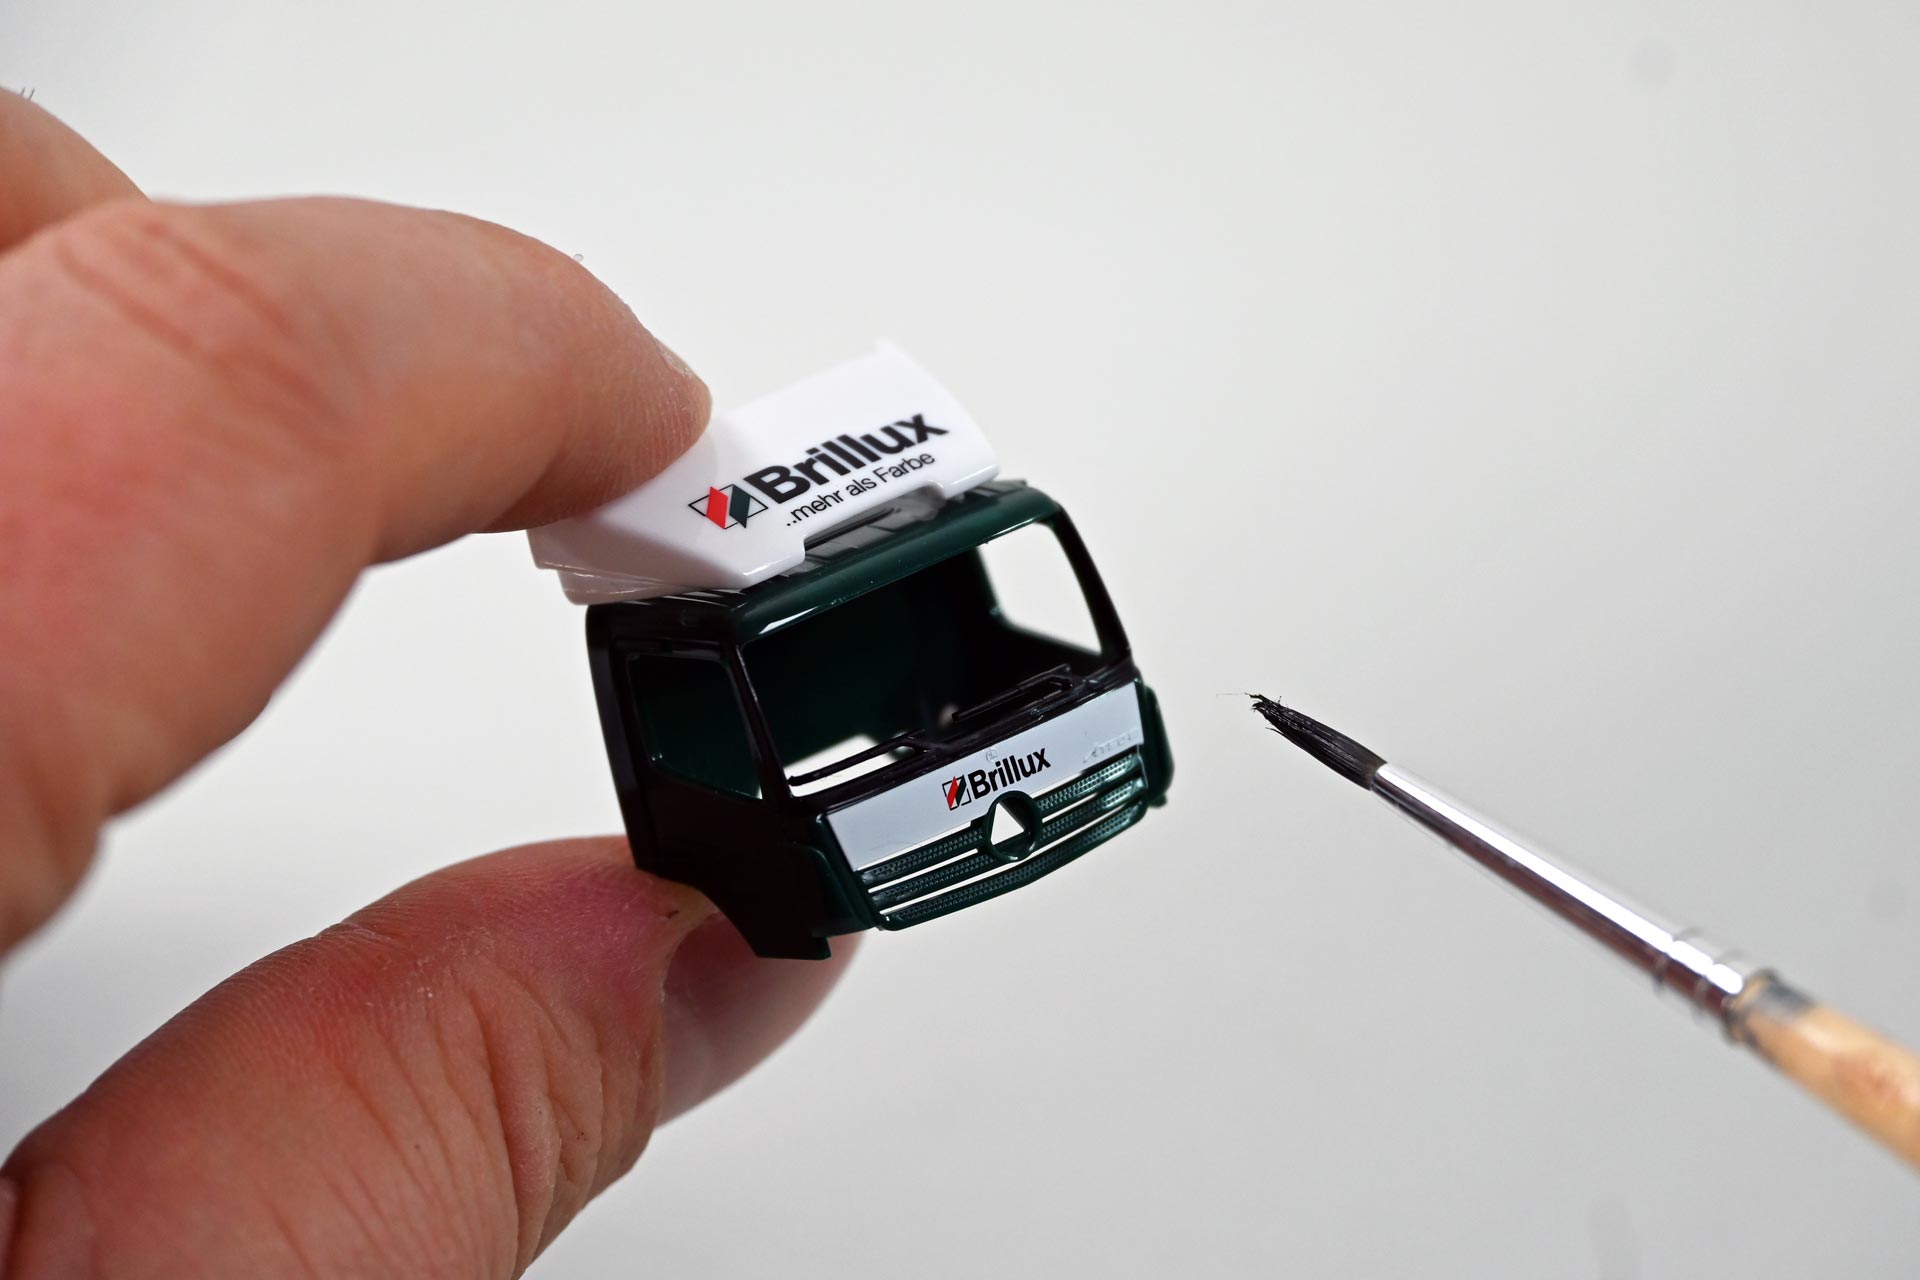
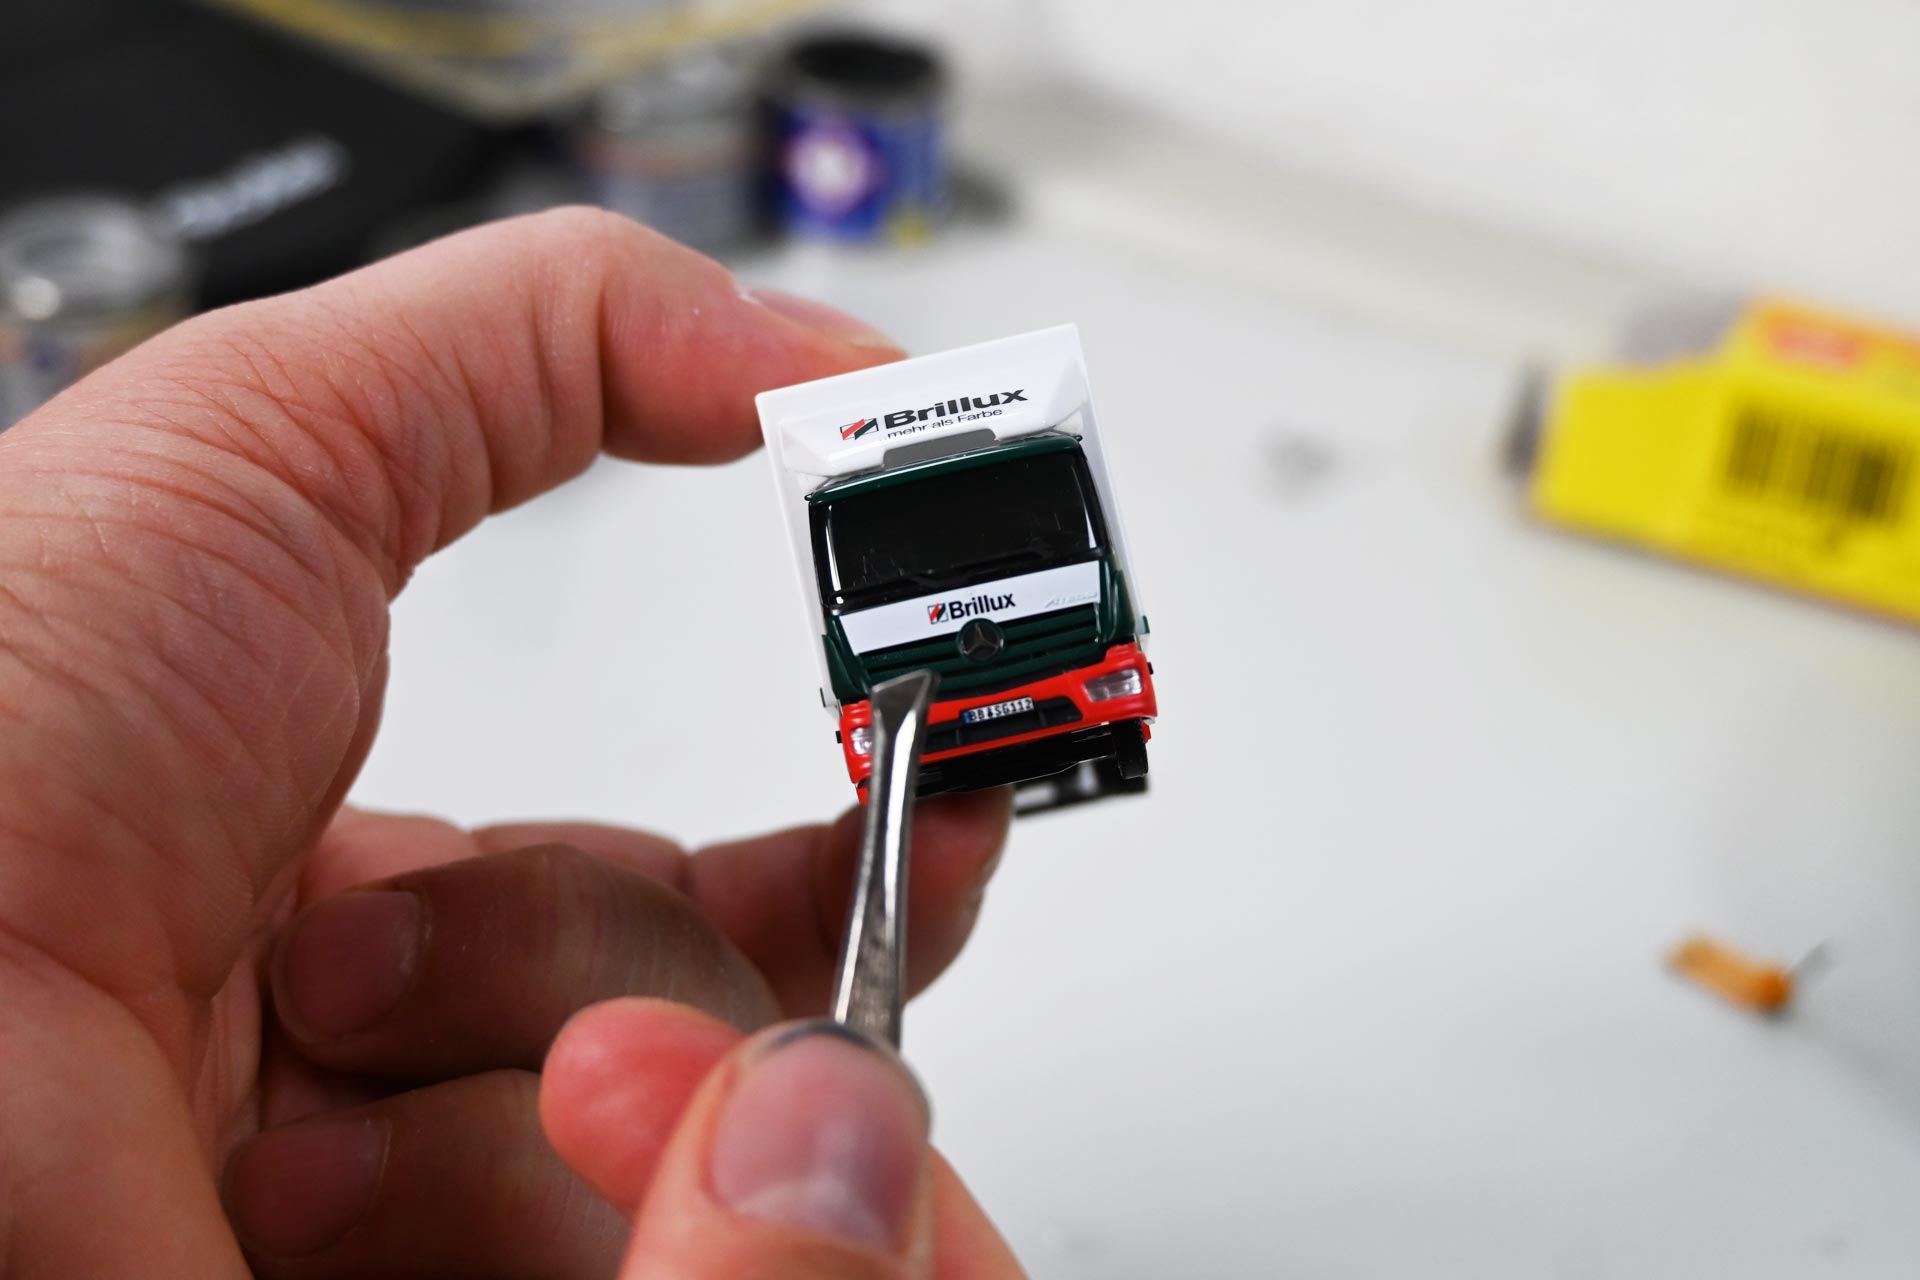
For most jobs, it is sufficient to lift off the box body or remove the tarpaulin from the flatbed. In the case of the Brillux-Atego, the windshield wipers should also be covered with black paint on their inside edges. To do this, the cab must first be carefully unclipped from the chassis at the rear and then loosened by moving it carefully until the Mercedes star, which holds all the components in place, can be released.
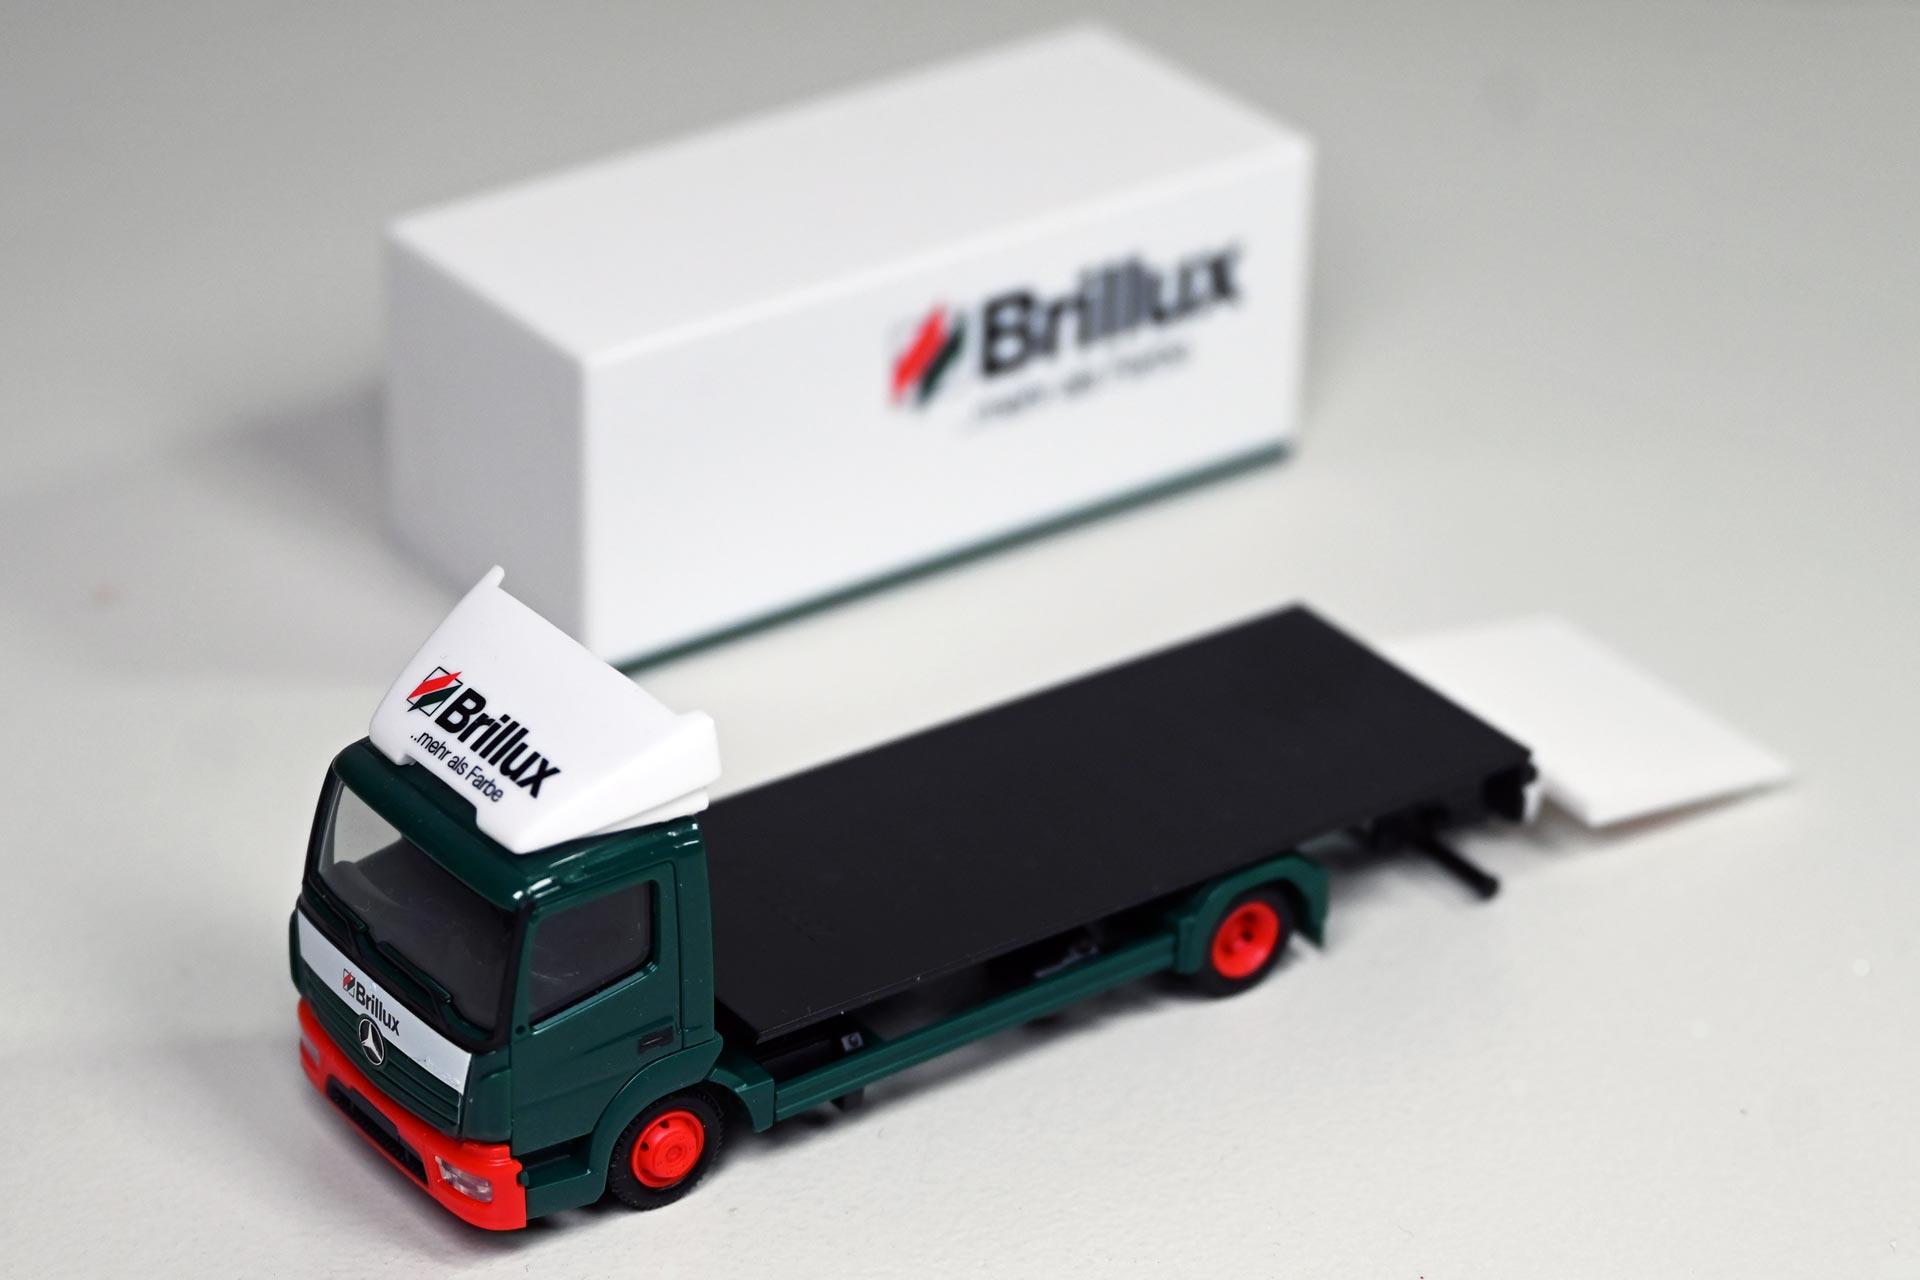
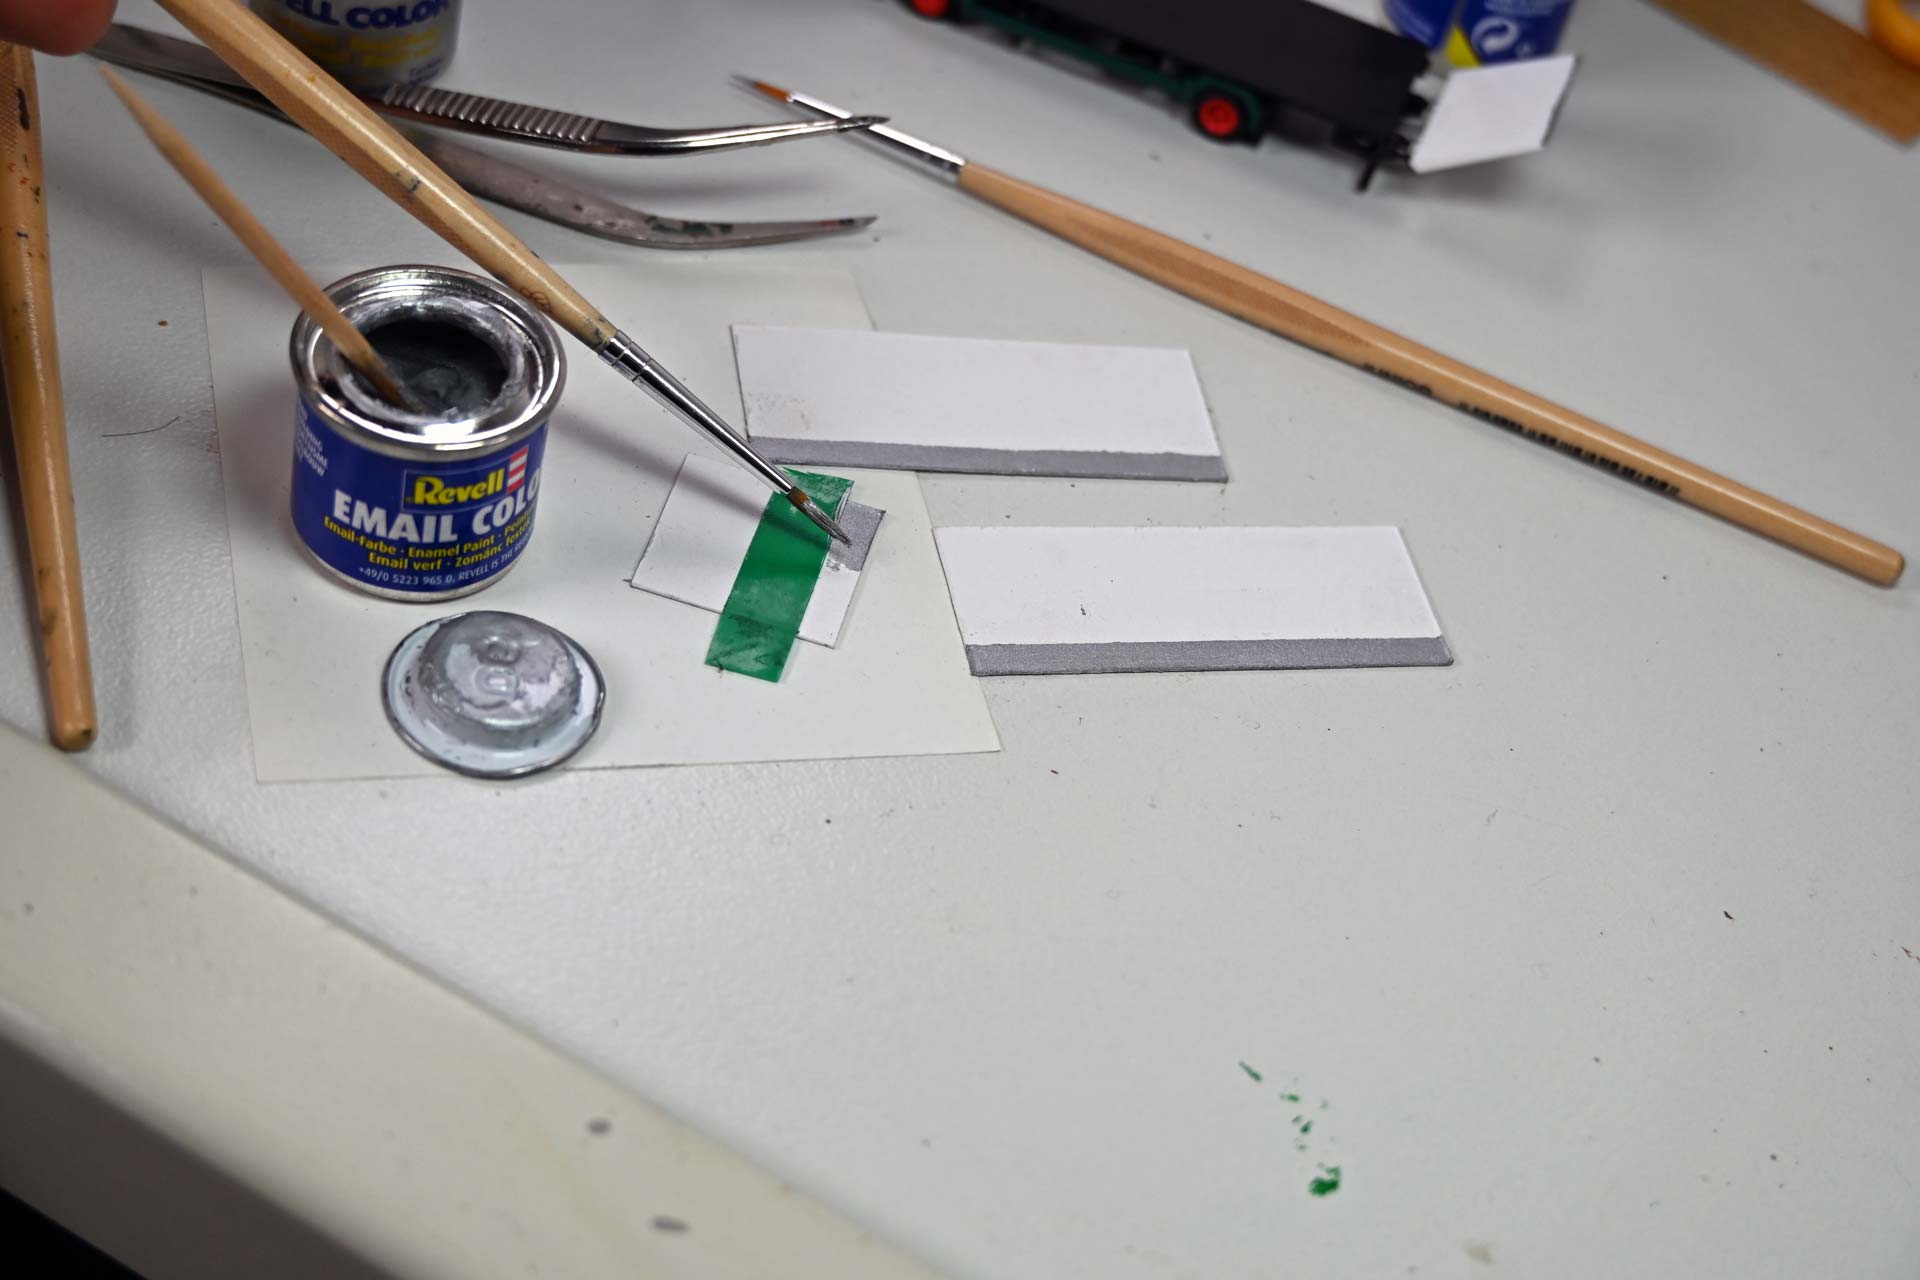
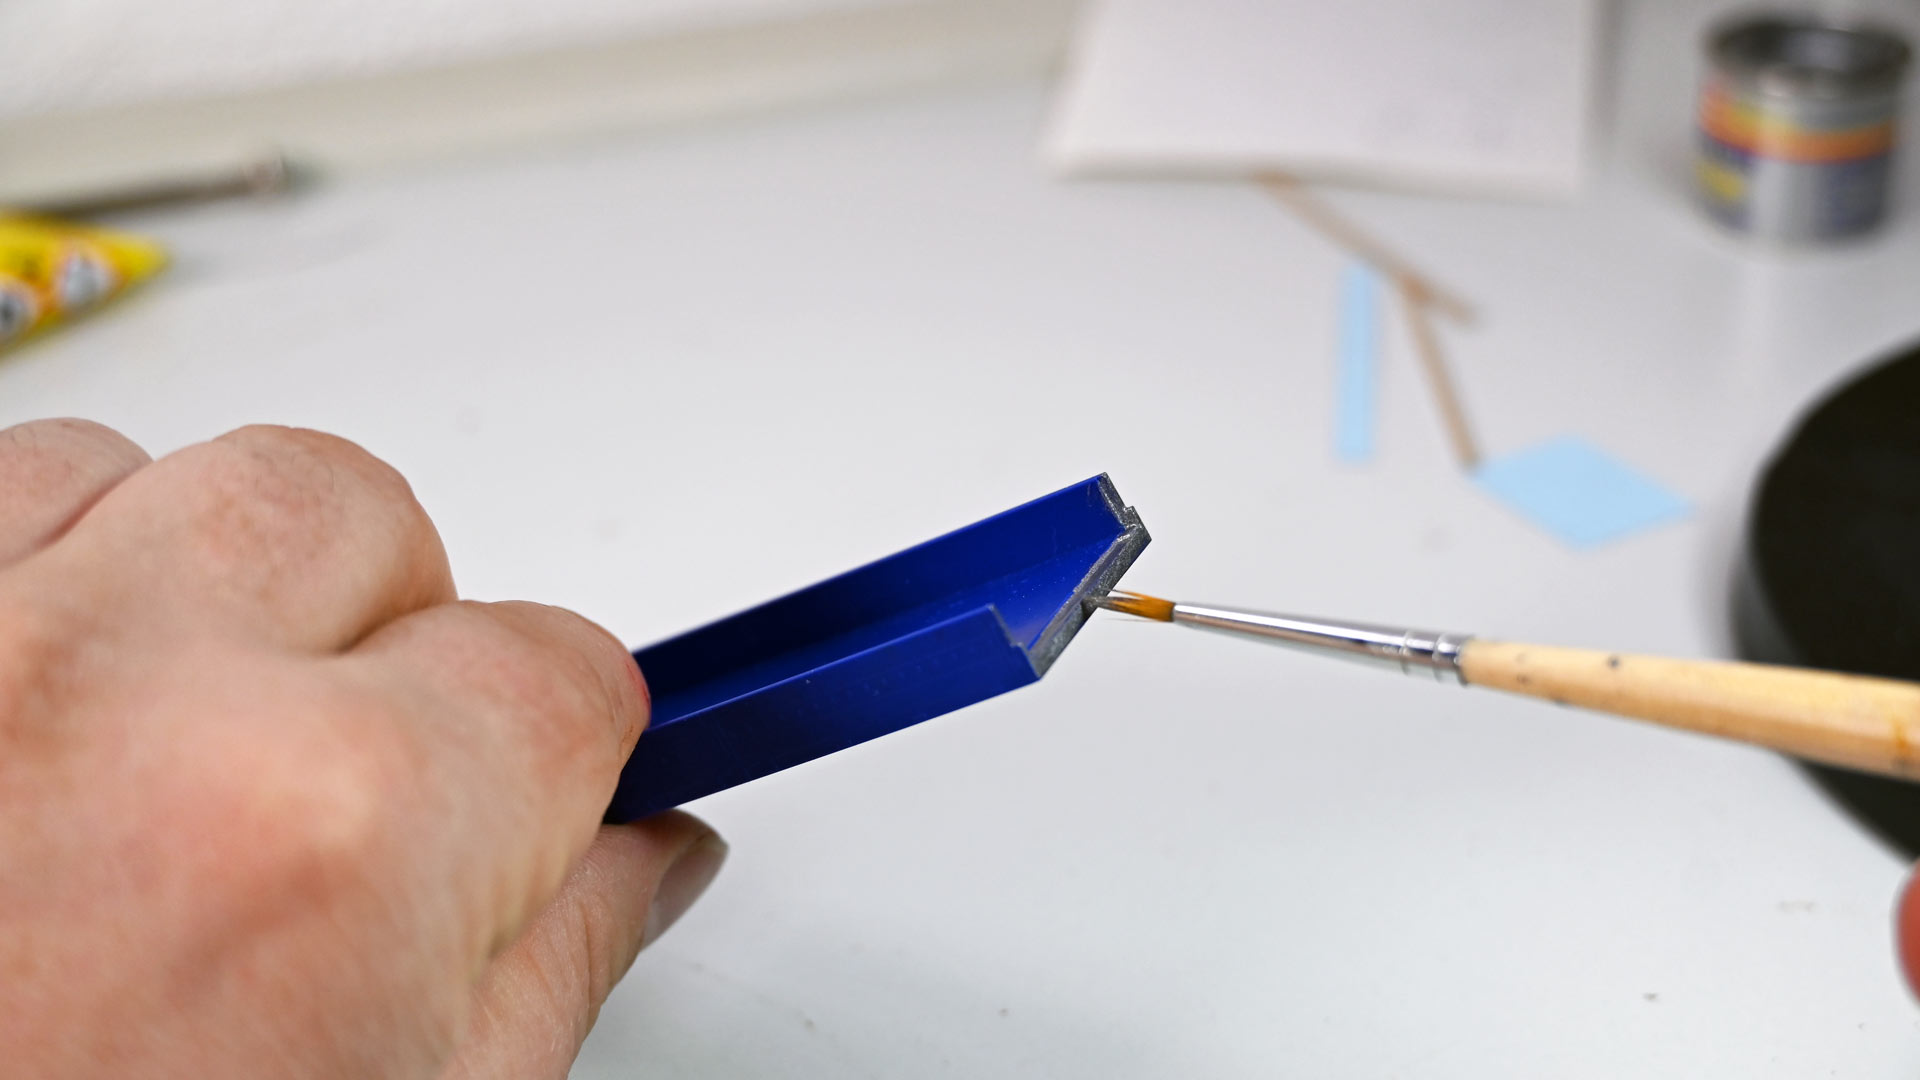
The painting work is done with a thin brush (00) and silk-matt black paint (e.g. Revell 302). If you want to create a little more contrast on the vehicle floor, you can also paint the factory dark-green mud flaps black.
Once the box body has been removed, the rear lights can be accentuated quite easily in different colors. It is advisable to proceed in a planned manner, using a fine brush and orange paint to highlight the reflectors on the side of the vehicle, while silver paint for the reversing lights is suitable for the edge of the luggage compartment of the box body and for the inside of the exterior mirrors.
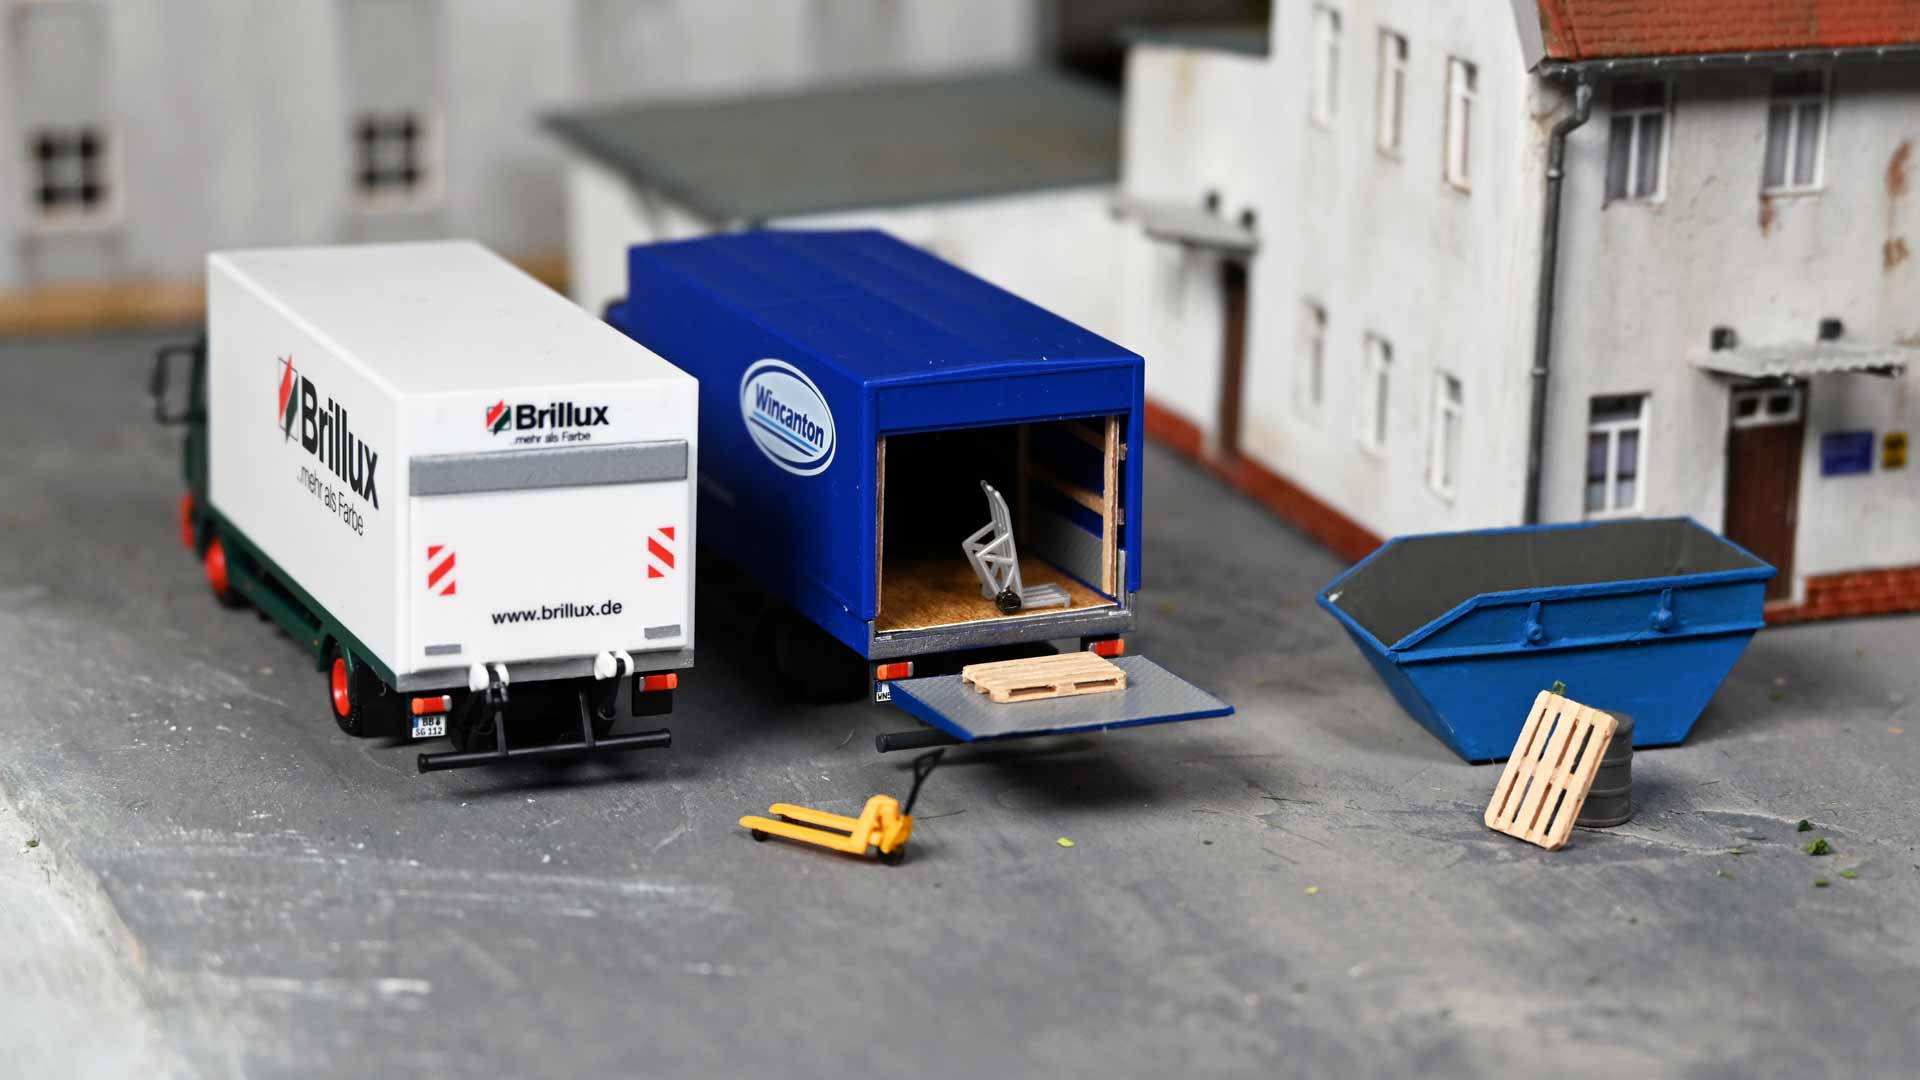
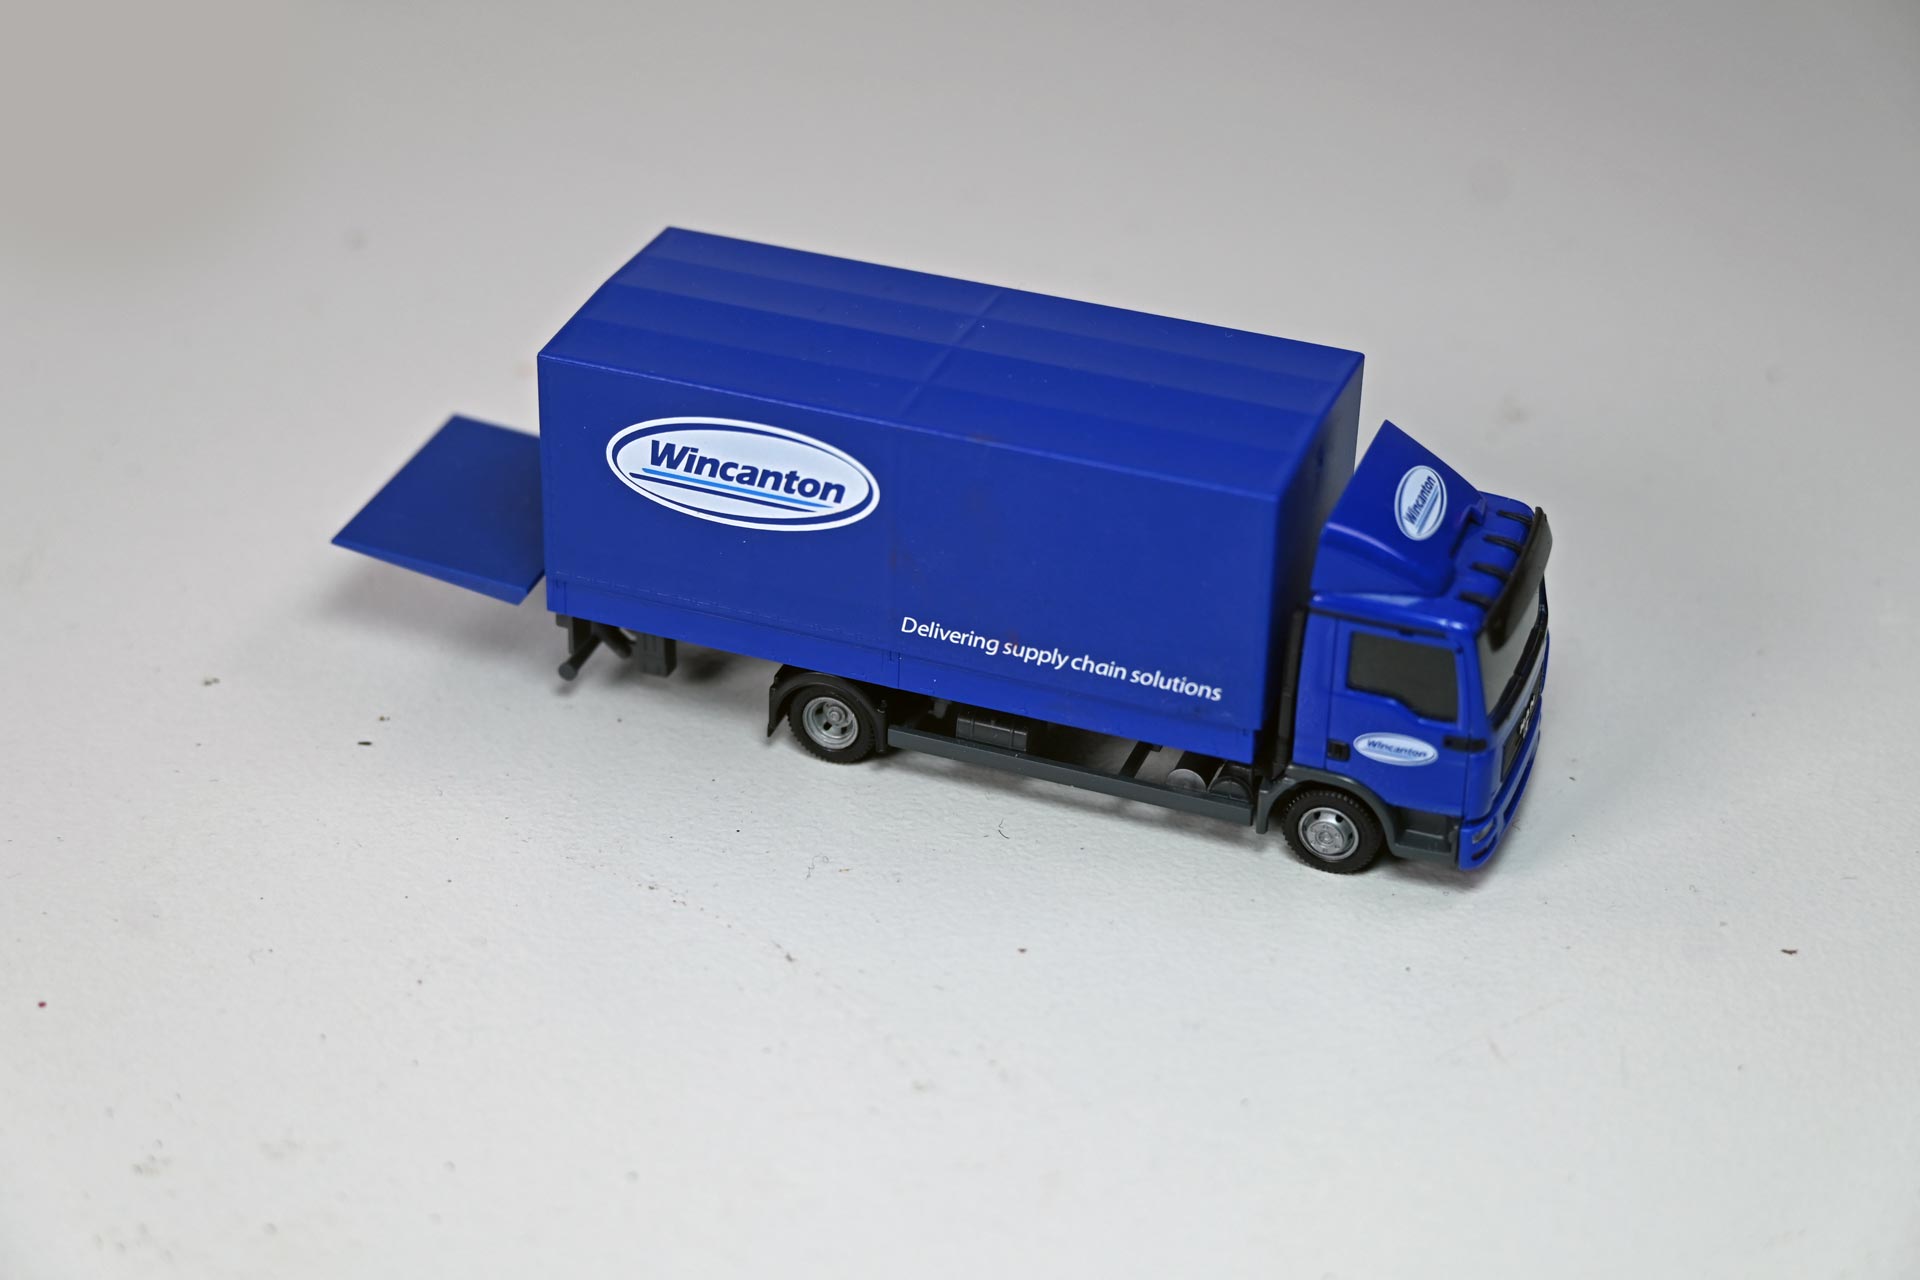
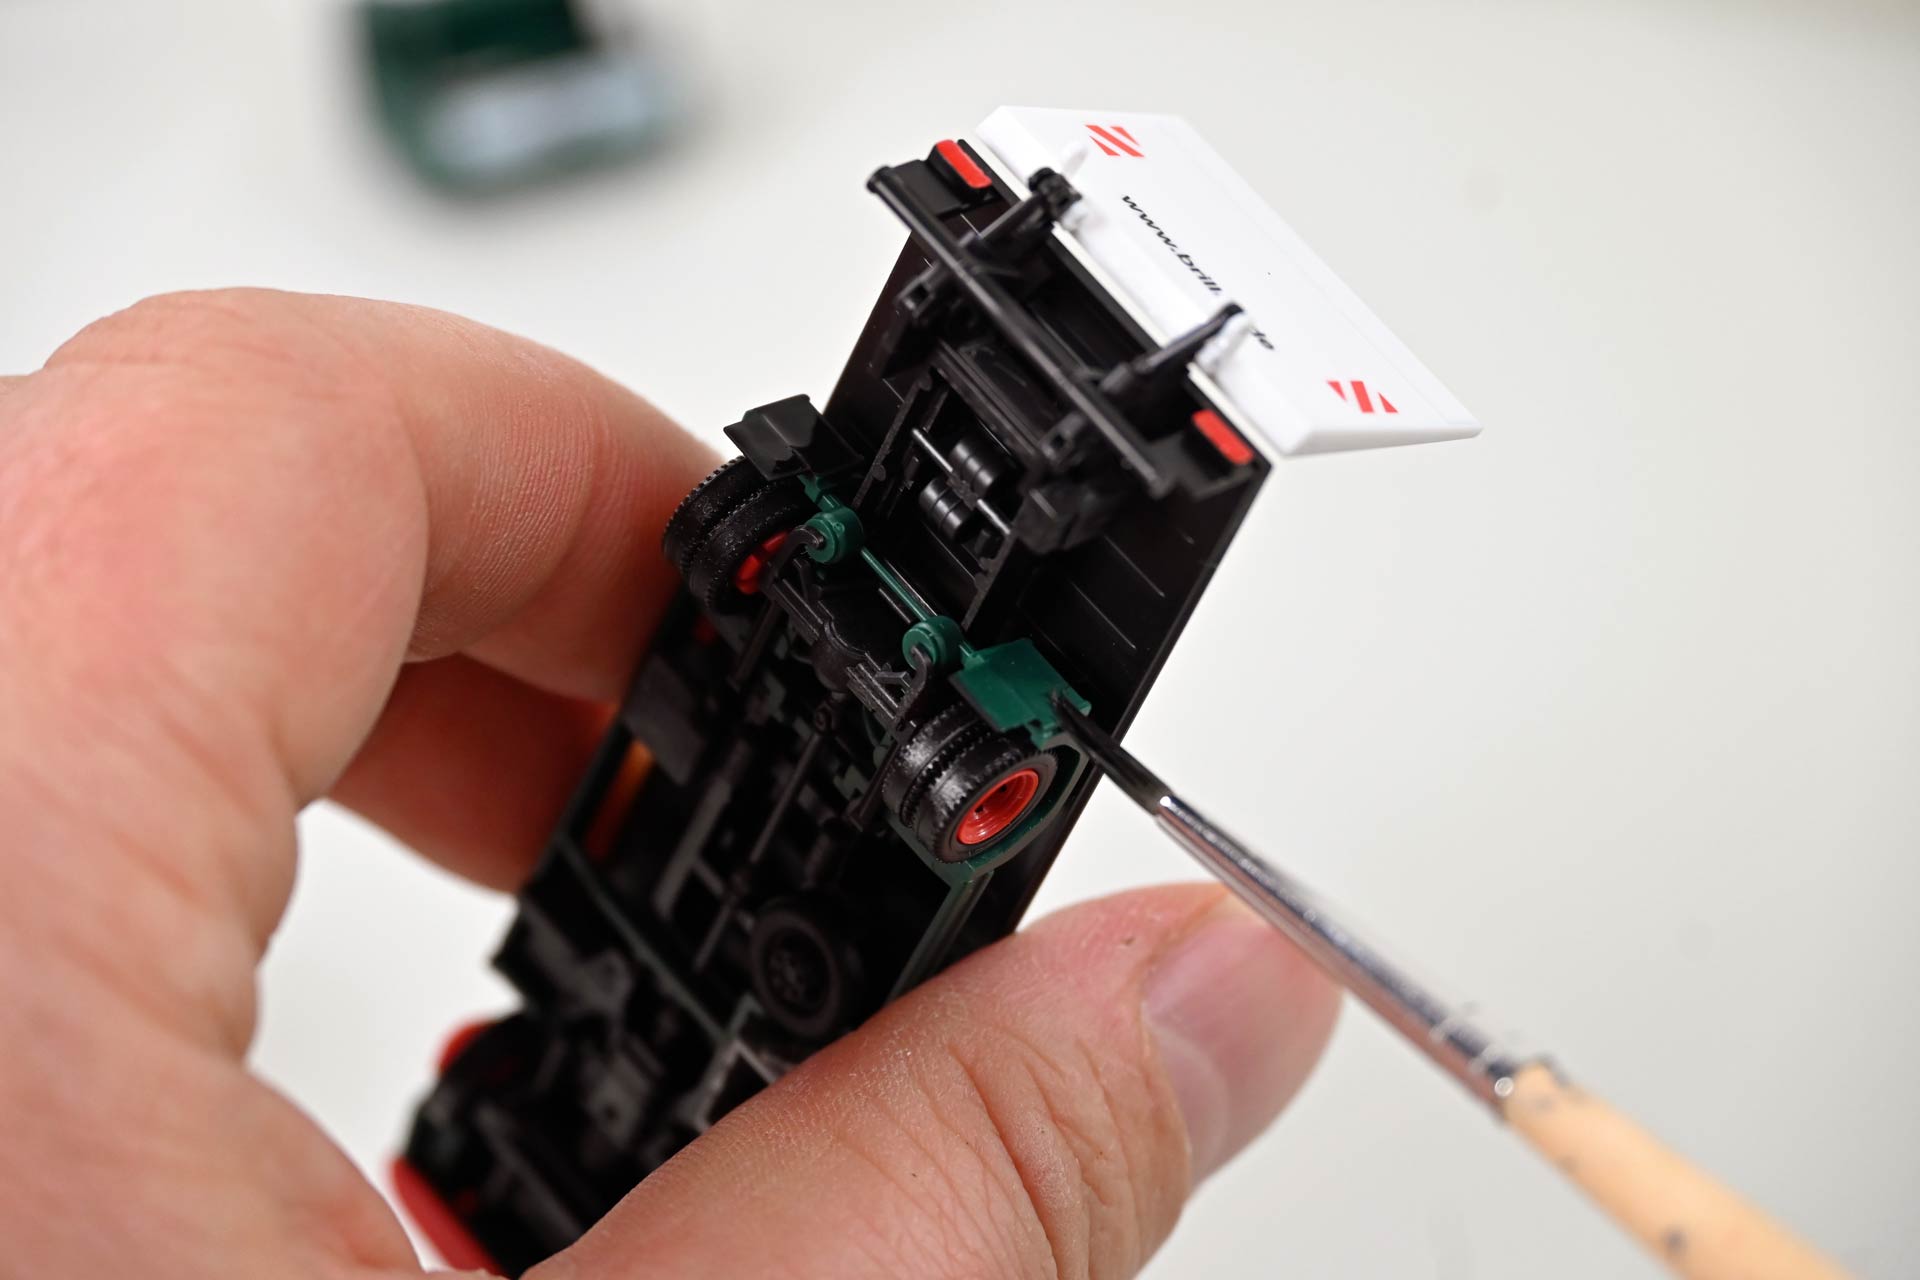
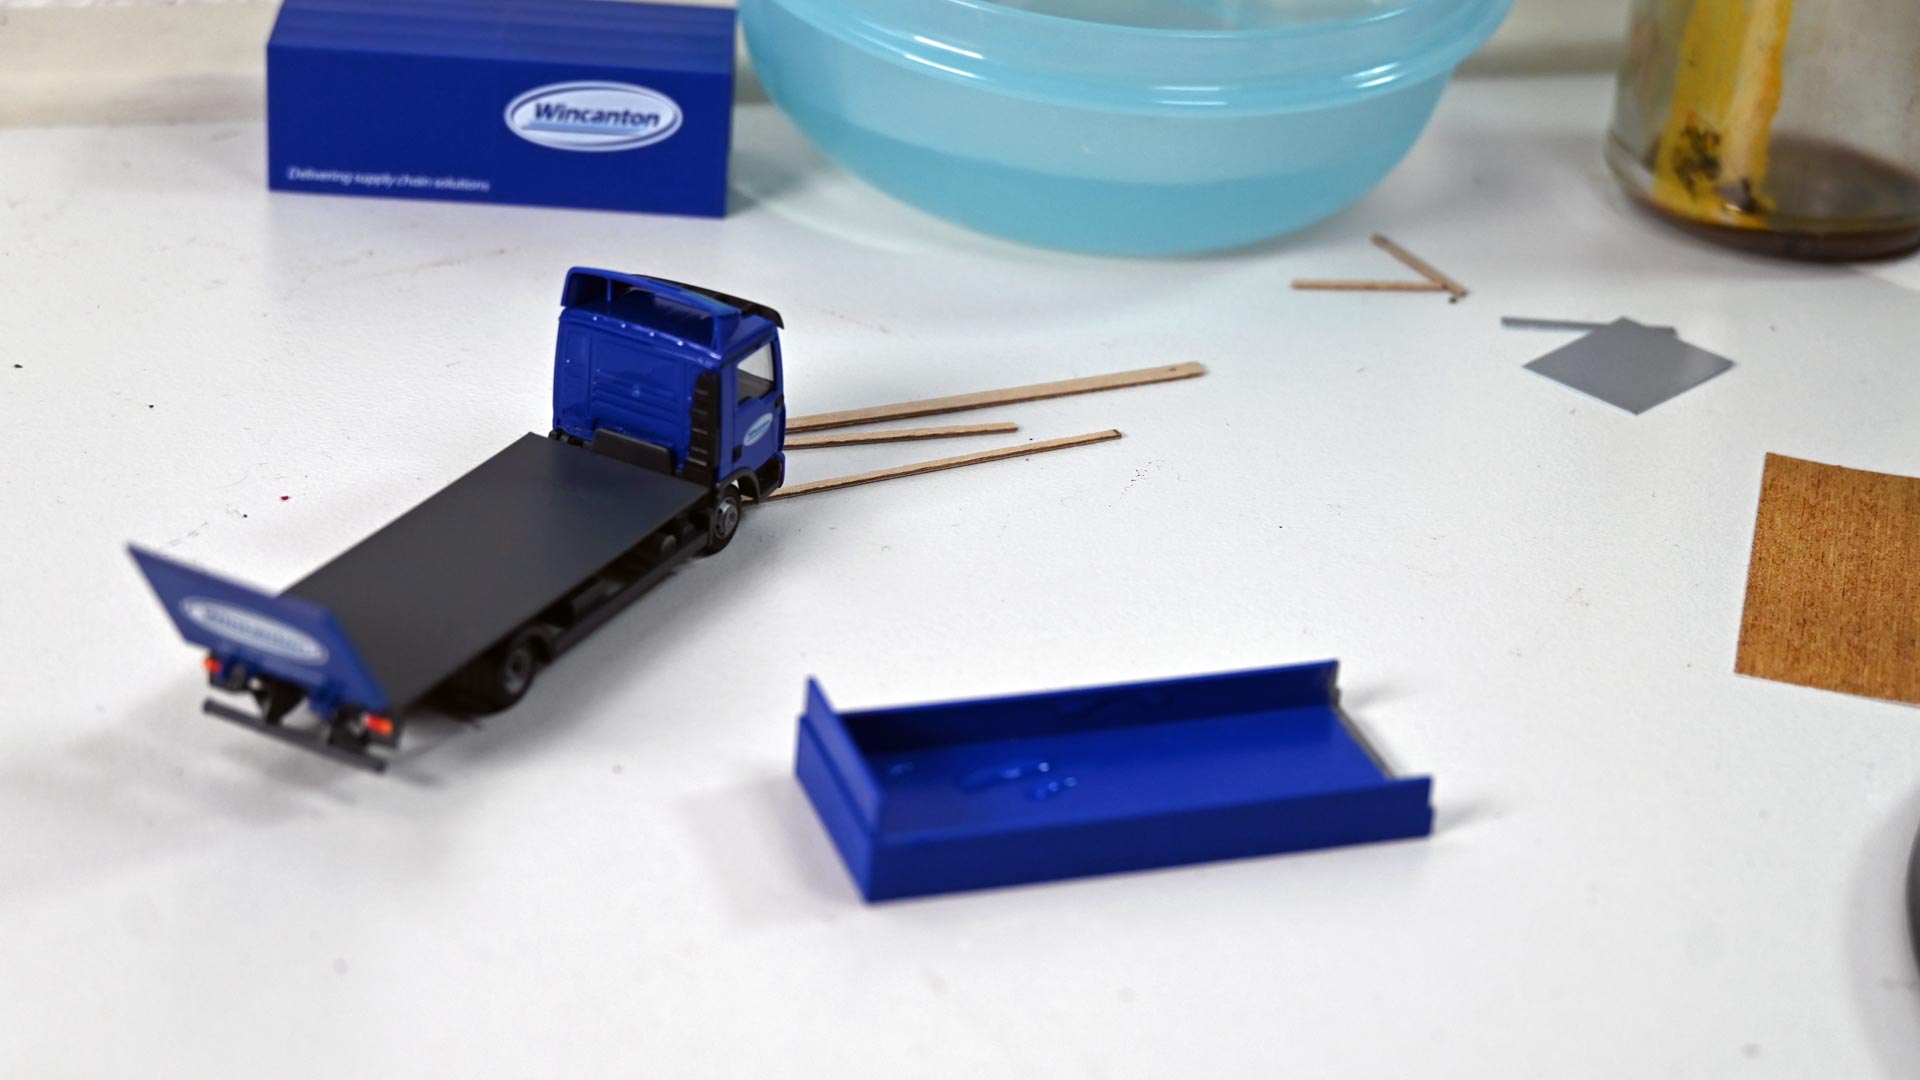
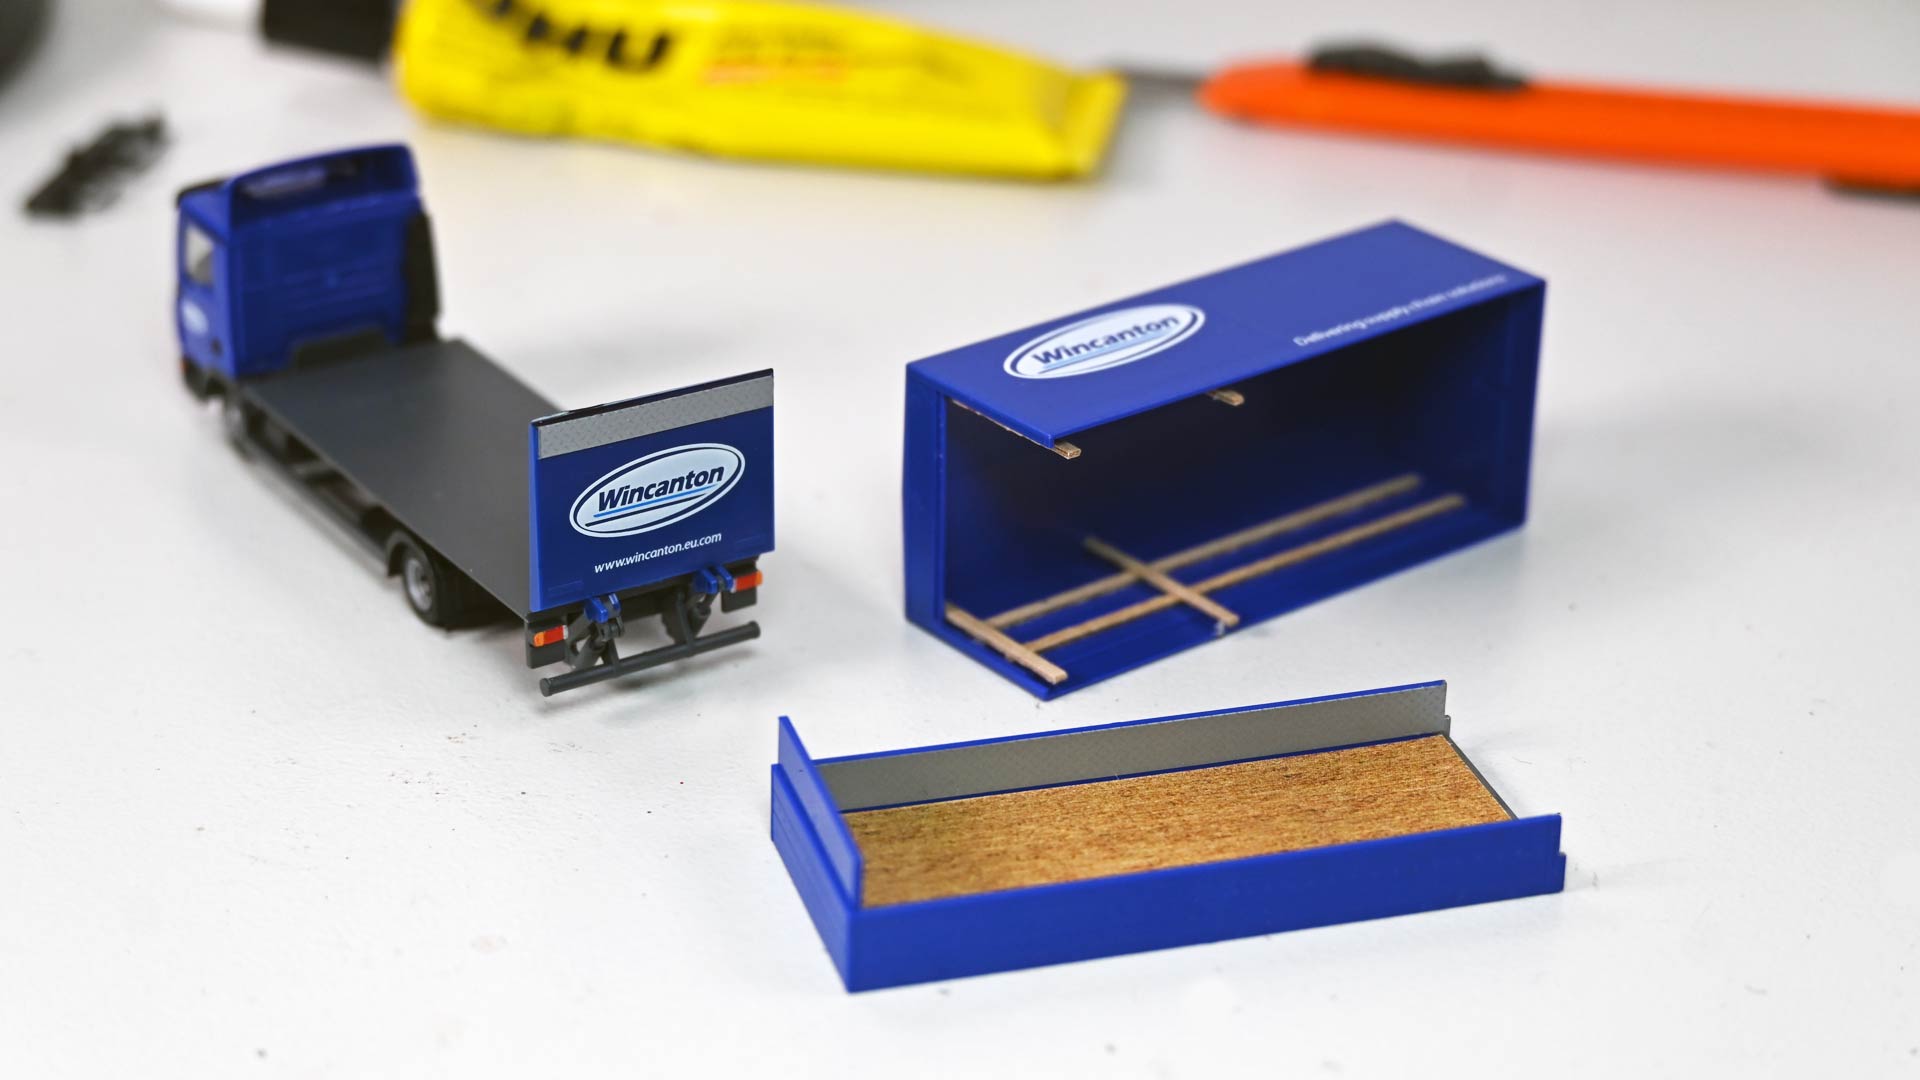
The cargo-bed
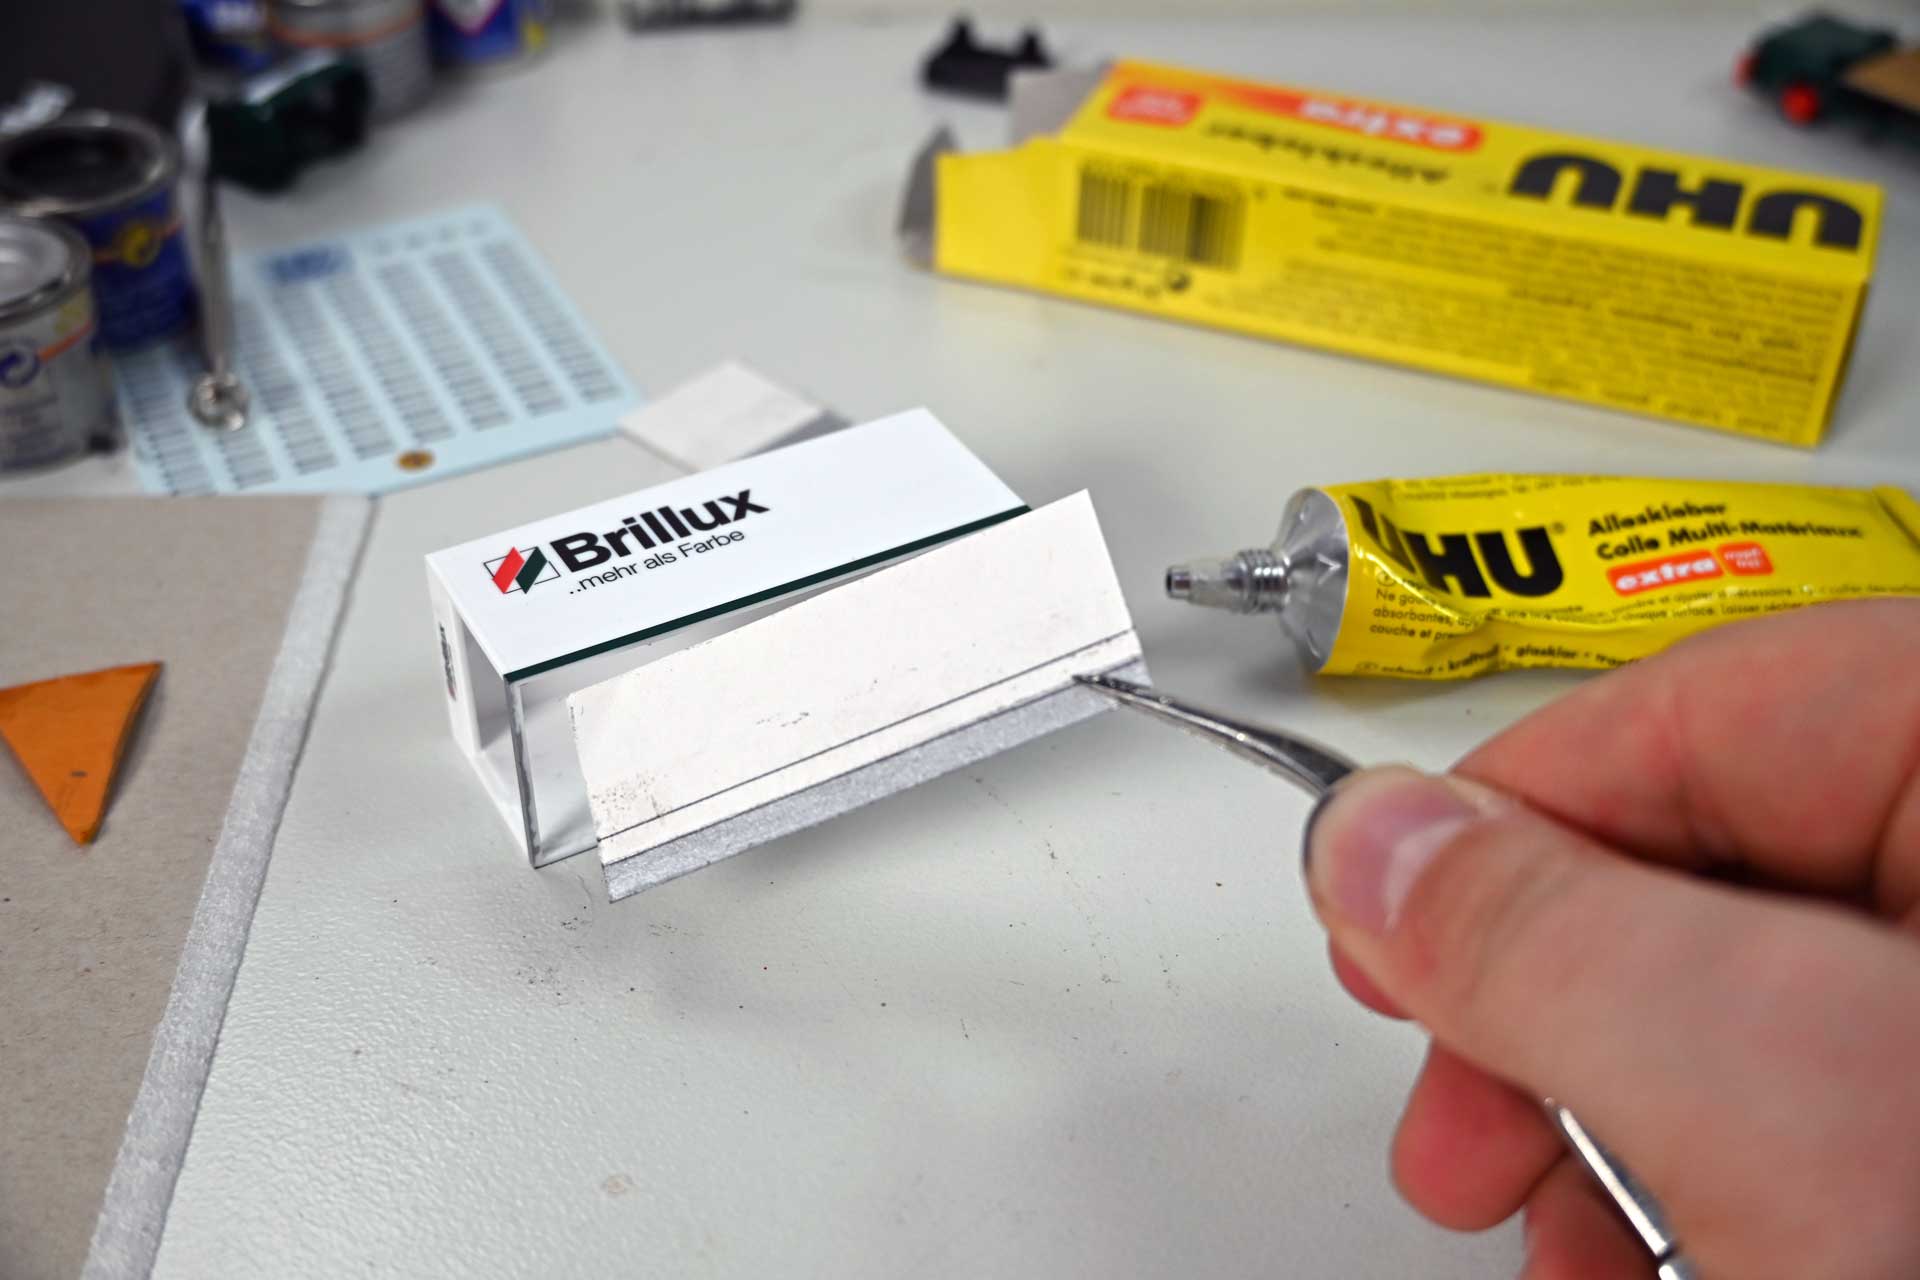
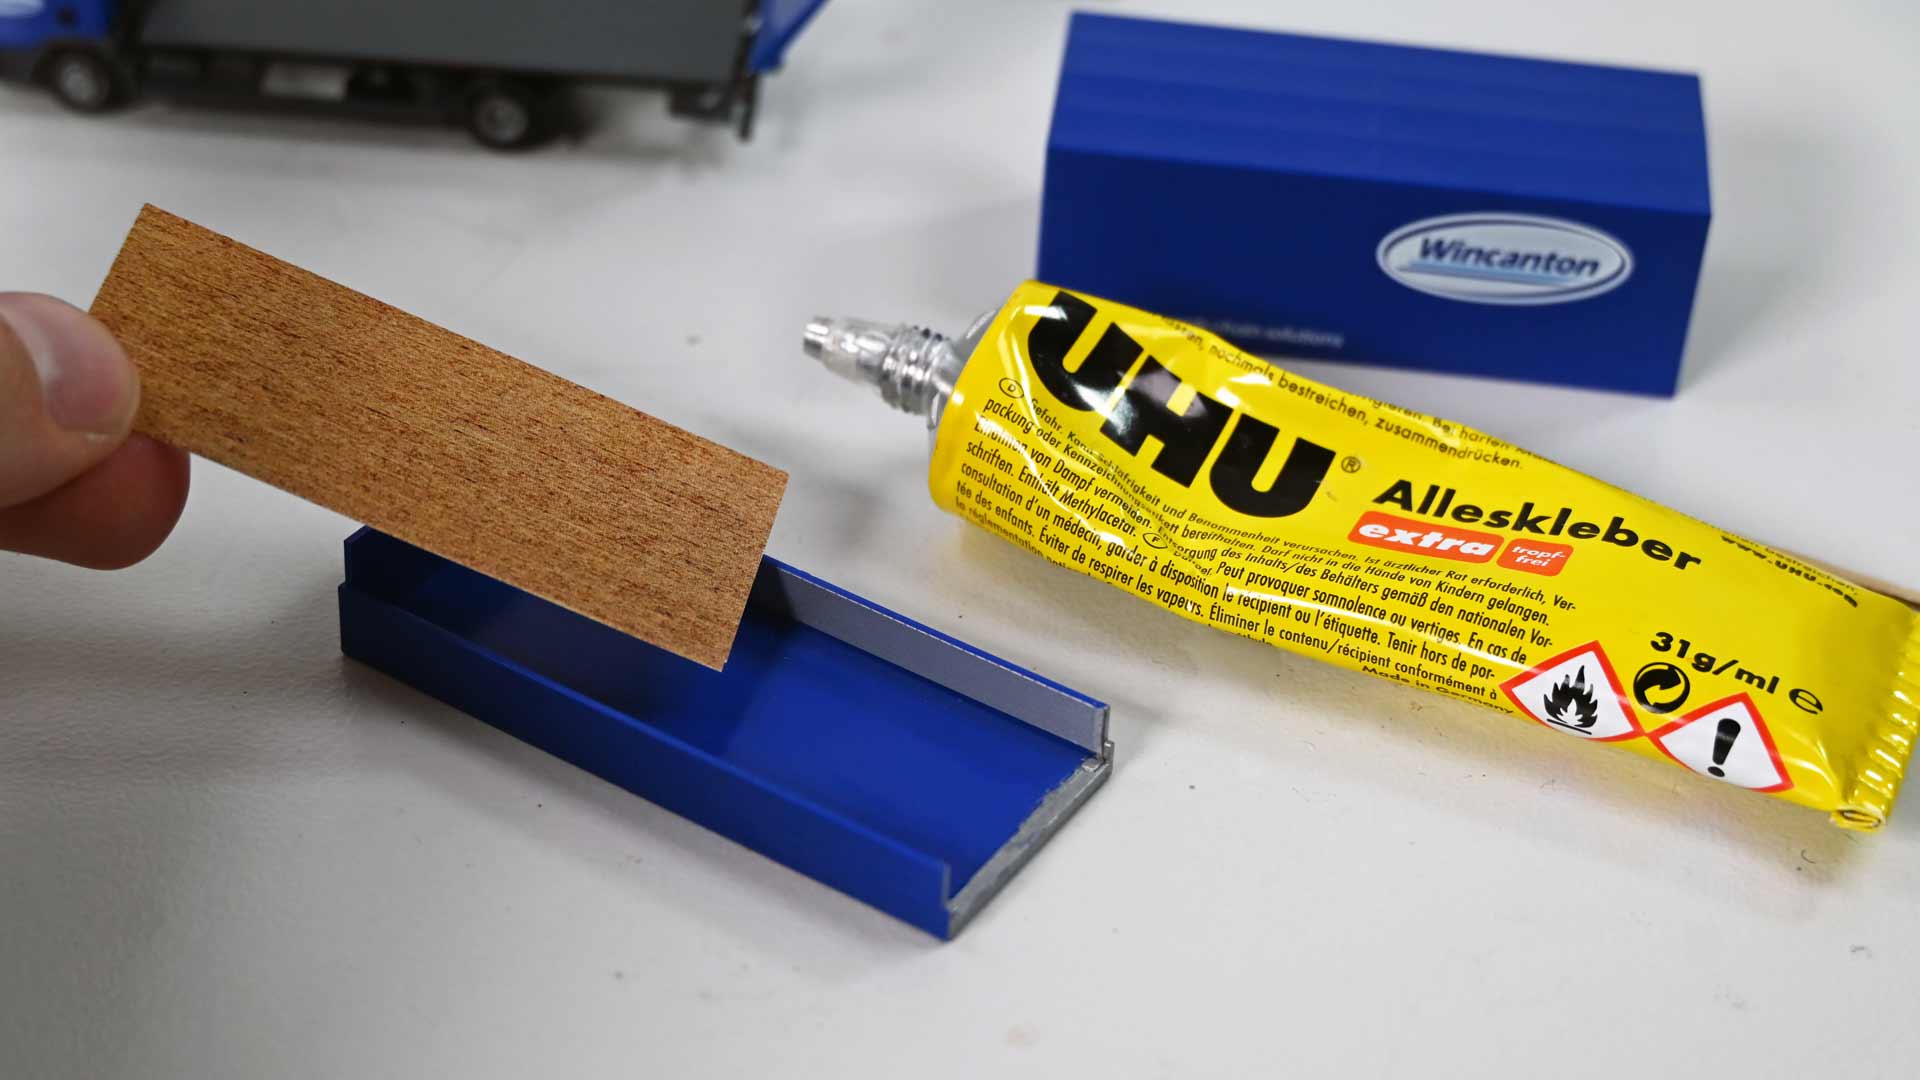
There are virtually no limits when it comes to designing the loading area itself. A wallpaper of a suitable multiplex board, appropriately scaled and printed in color on A4 paper, is enough to create a convincing impression. Ambitious hobbyists might try their hand at employing wood veneer, but they should keep an eye on the thickness of the material. The printed paper used here can be attached directly to the loading area with UHU all-purpose adhesive. The inner lining of the box body is made from photo cardboard, while the sheet metal trim in the base area is imitated with silver paint. These parts can be attached directly to the inside of the box body using all-purpose adhesive.
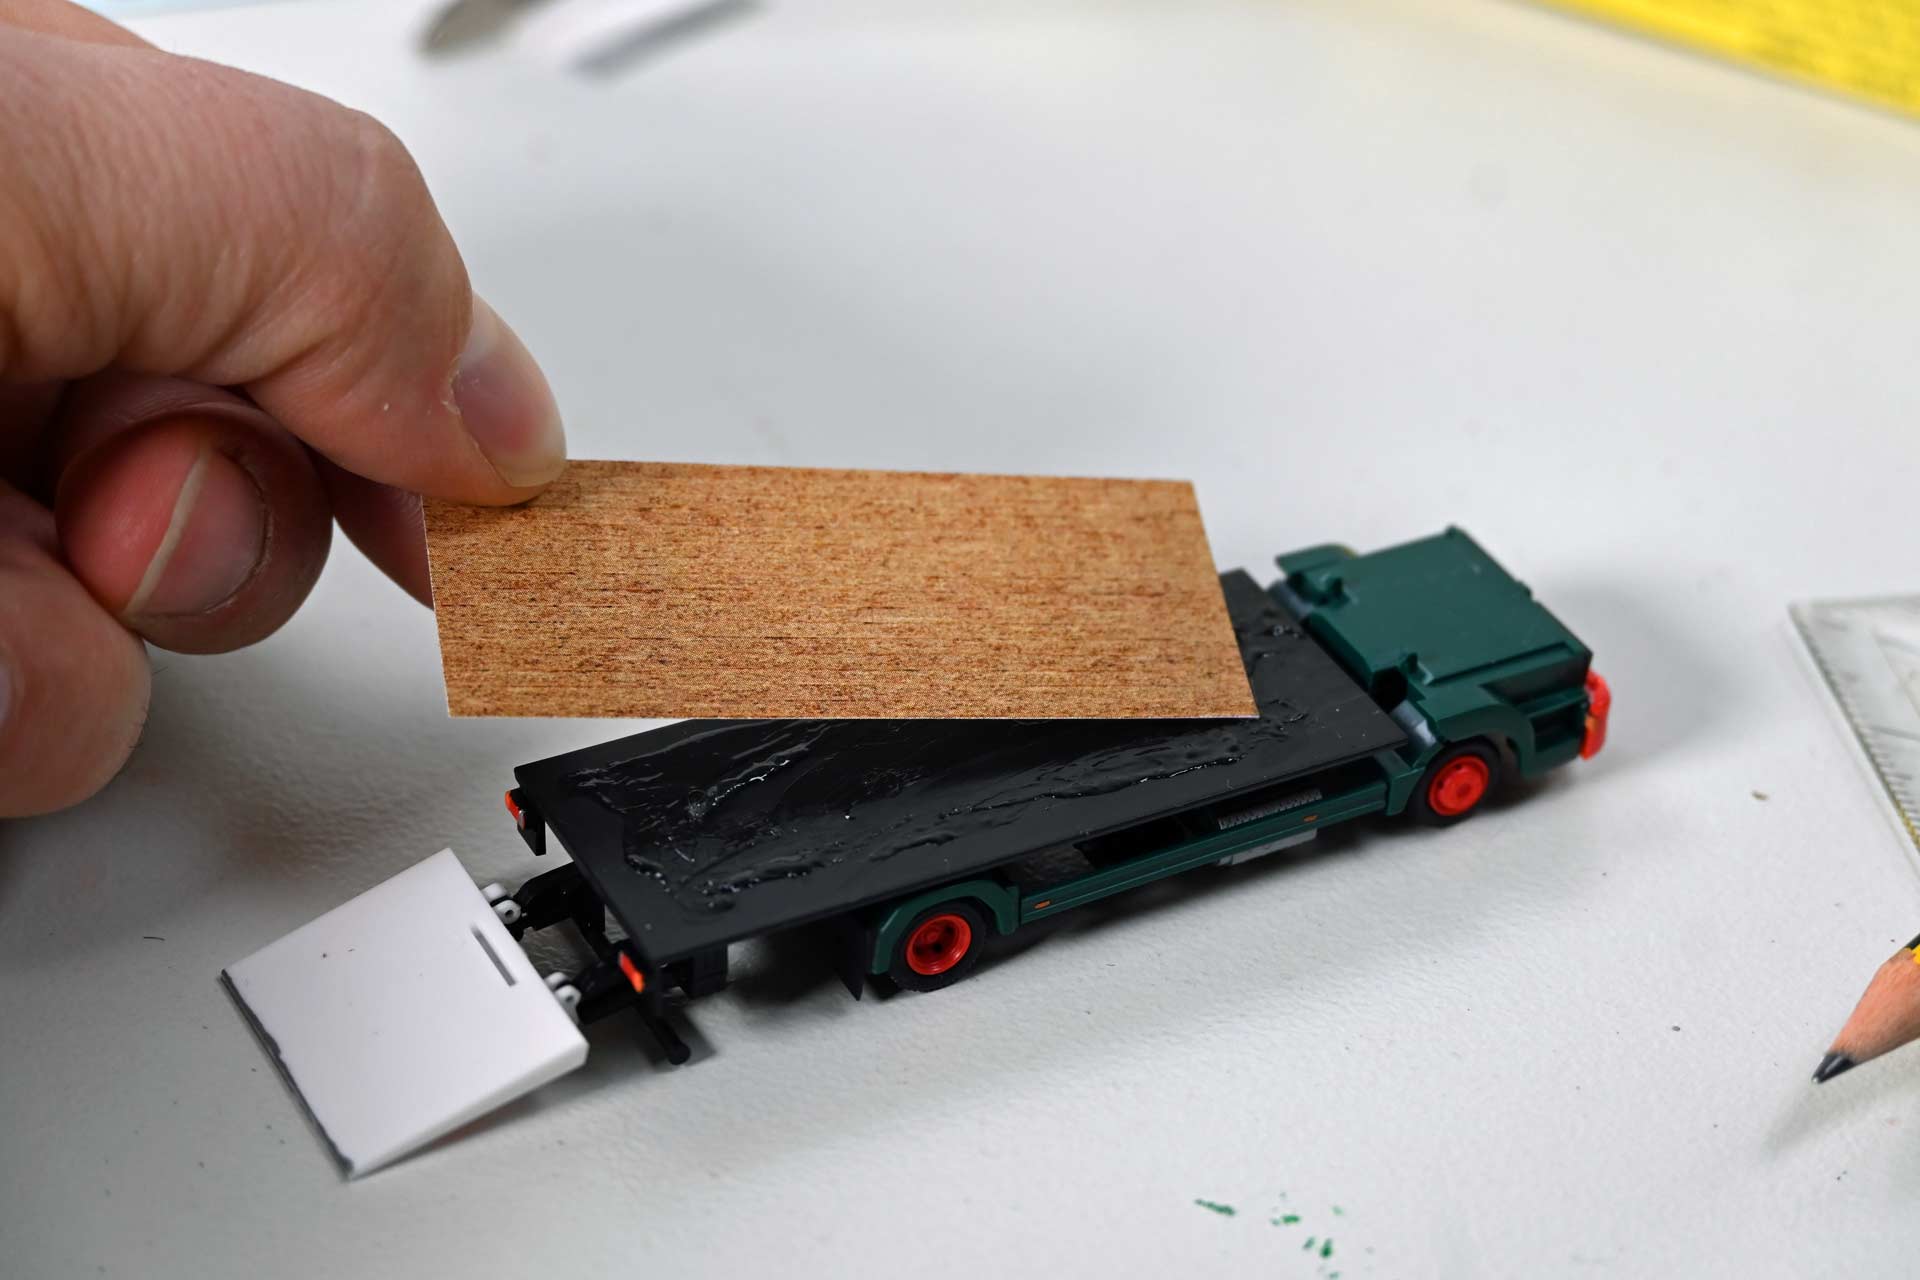
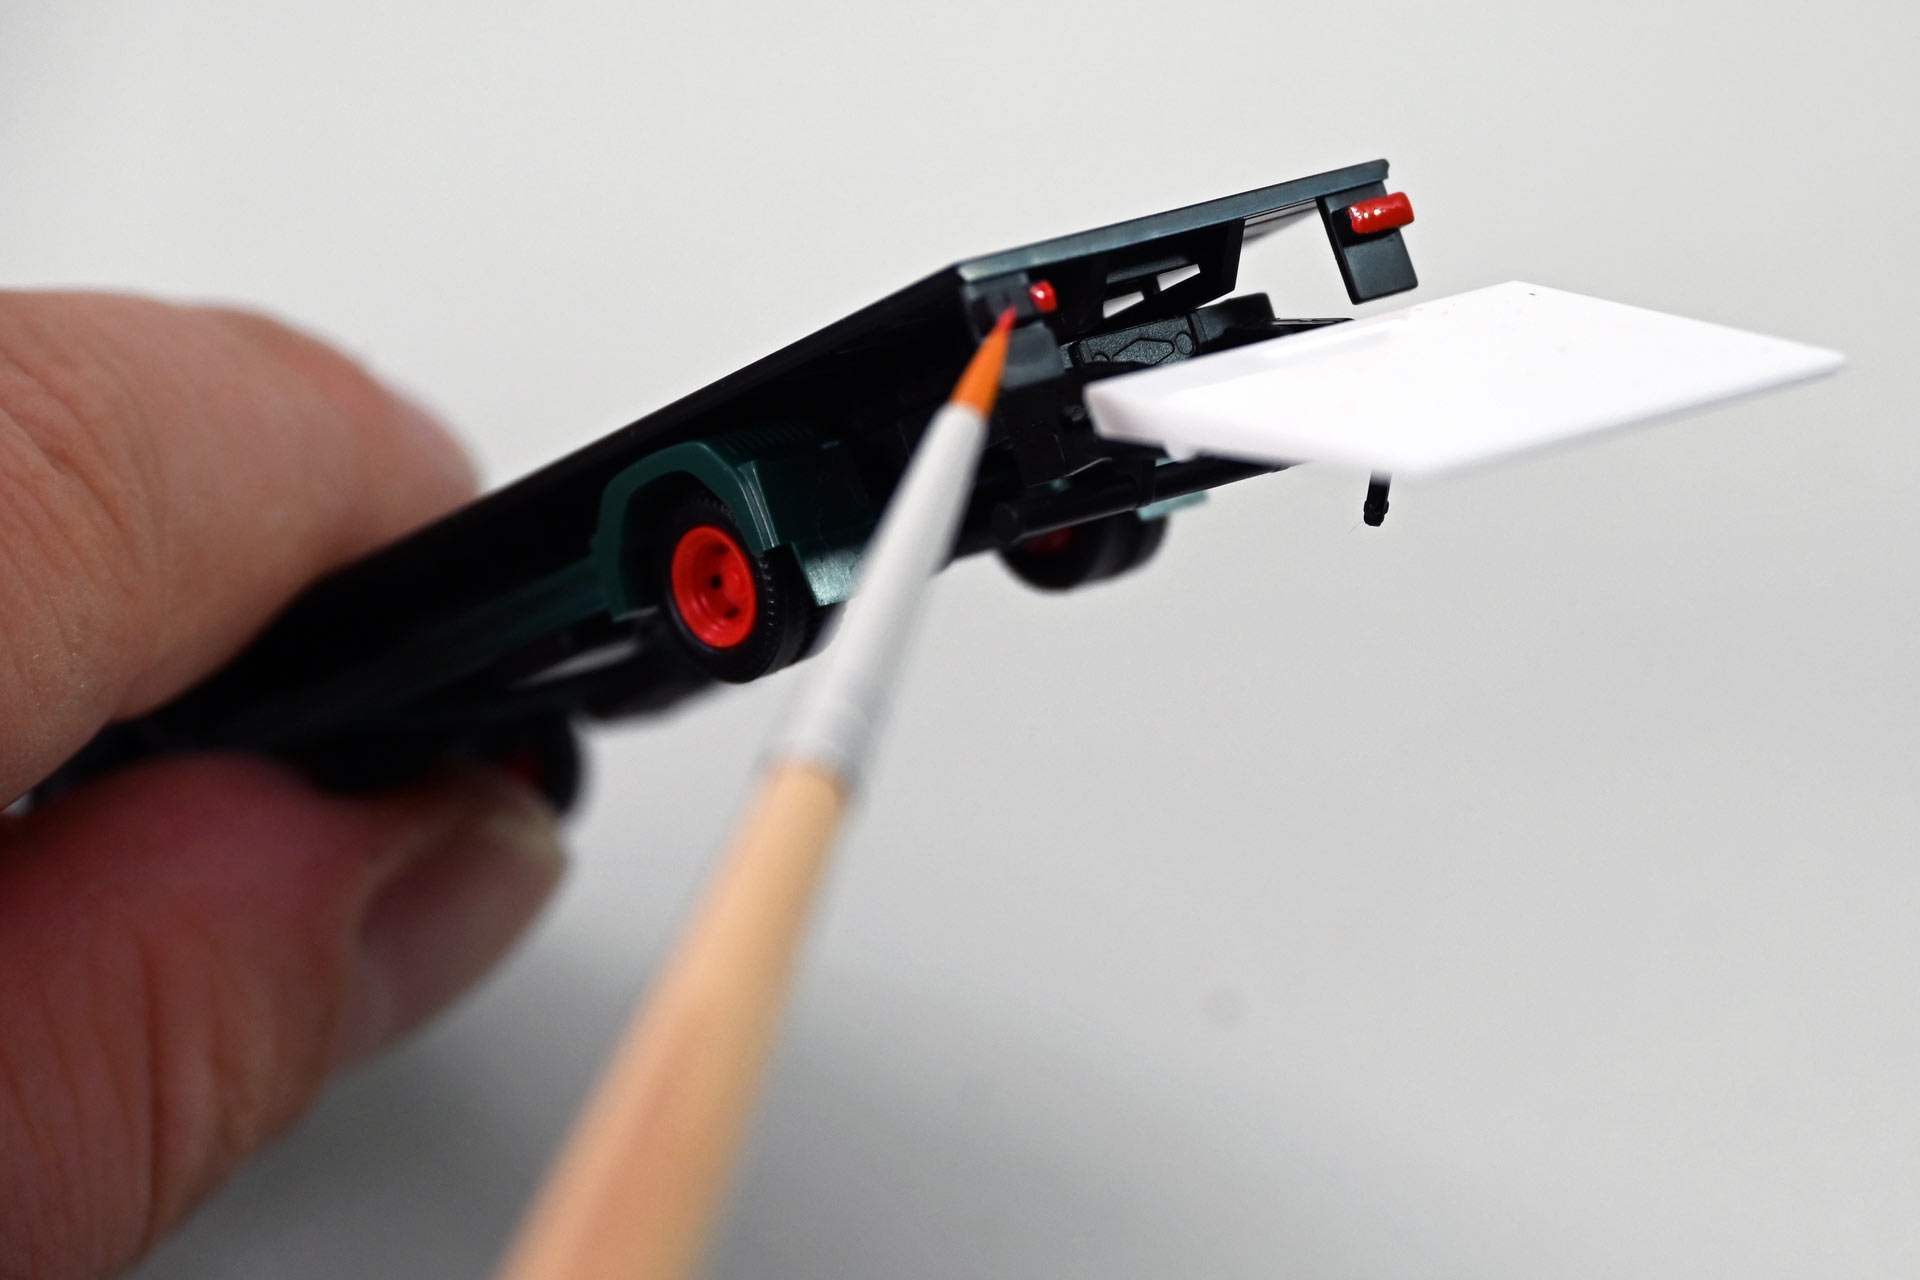
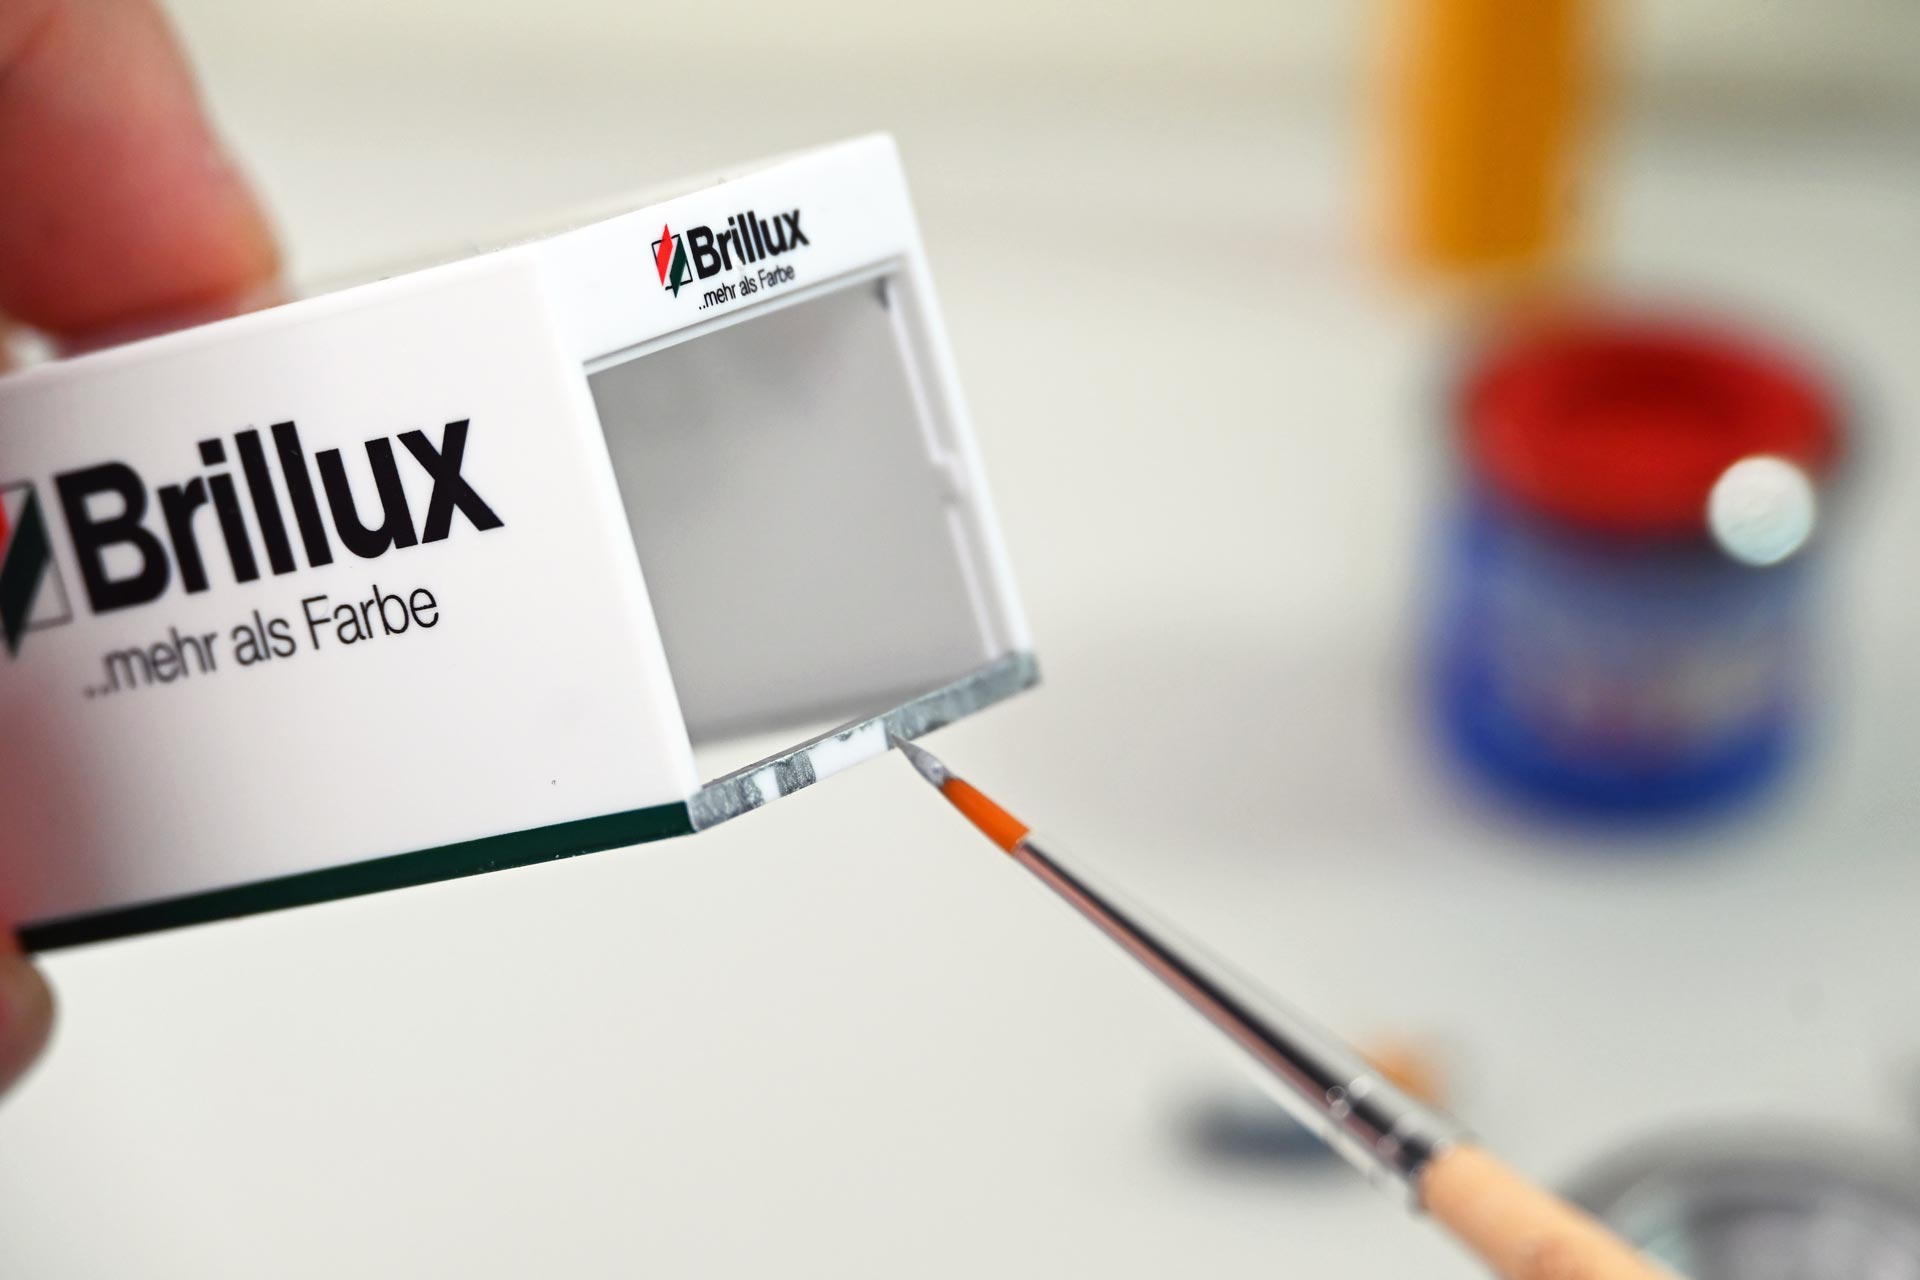
Biggest improvement to the tail lift: checker plate
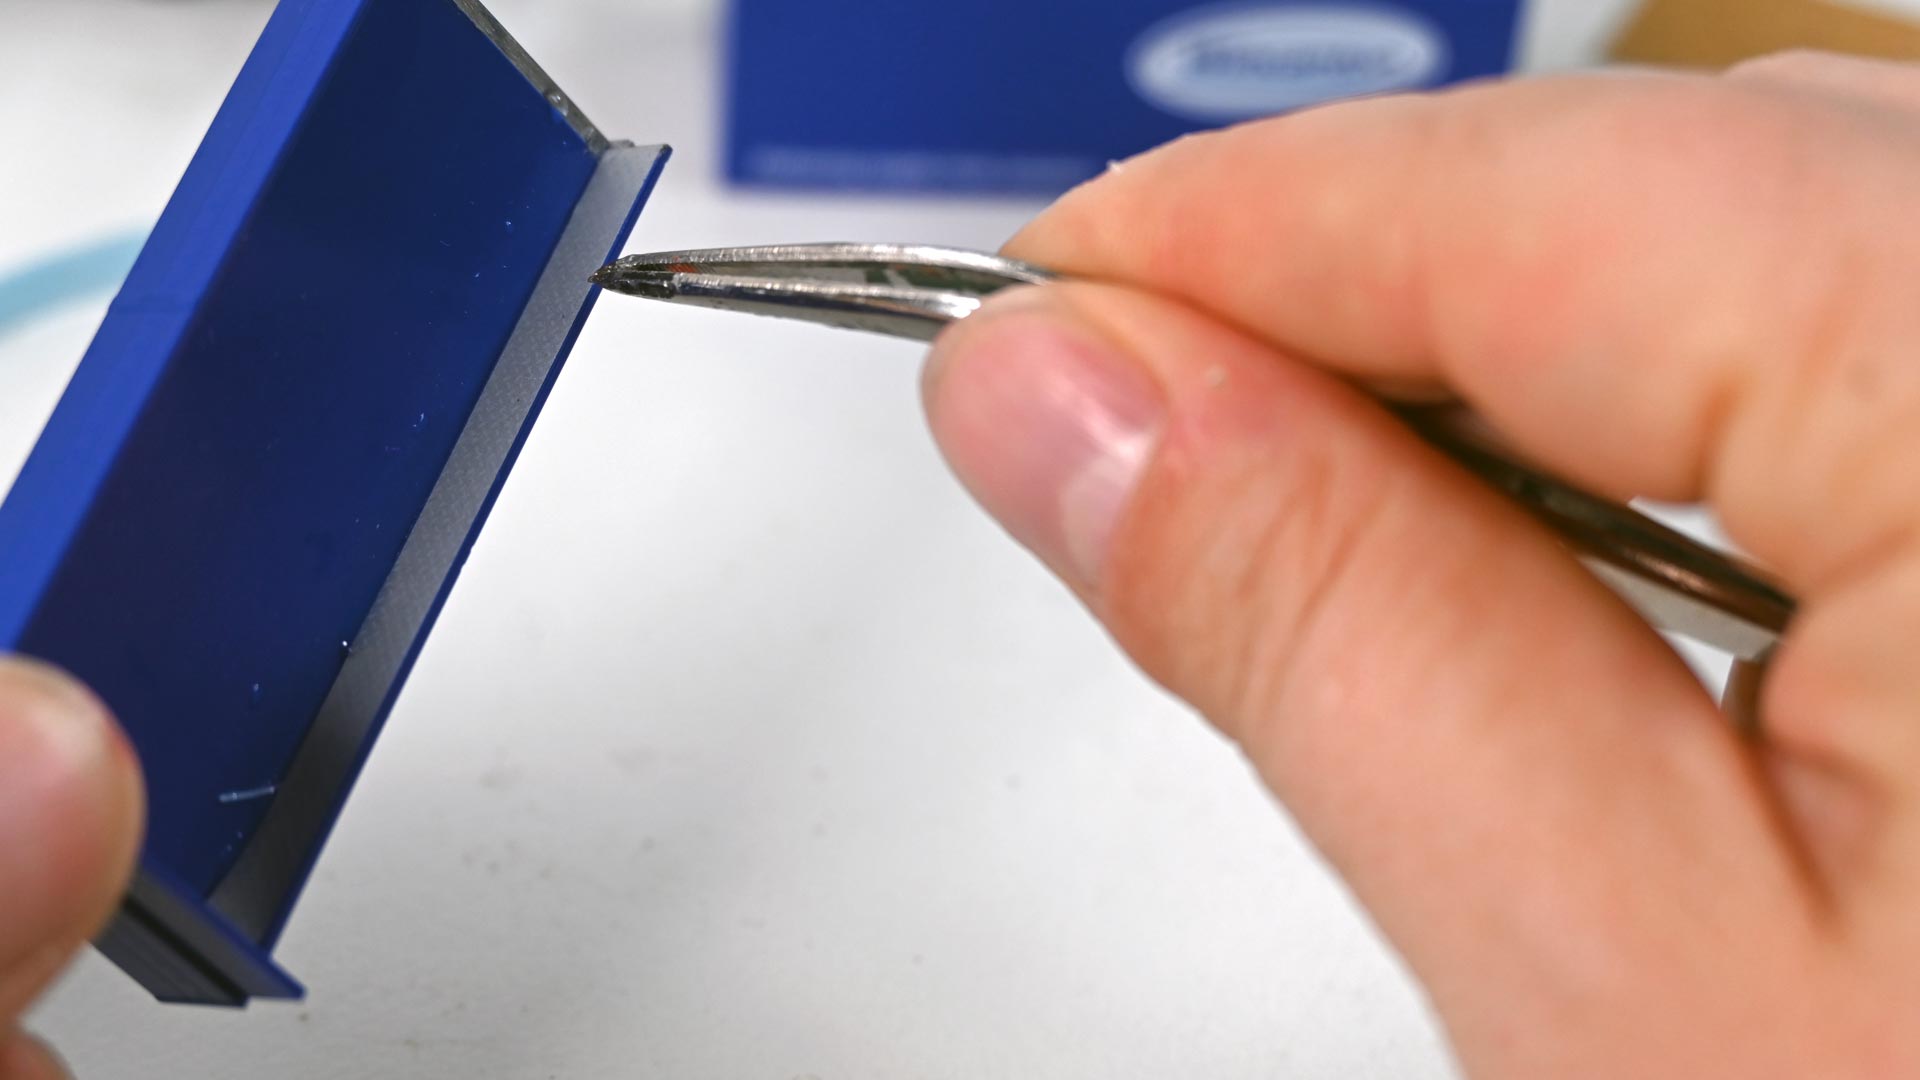
Here, too, the hobbyist is spoiled for choice: Finely etched crow's foot plates, for example from Weinert, certainly offer the best visual results, but the relatively high weight must also be taken into account here, which may mean that the tail lift can no longer be closed. The choice therefore falls on the somewhat simpler, but relatively inexpensive and feather-light wet sliding panels from TL Modellbau. Cut to size, they form both the inner lining of the ramp and a narrow protective strip on the outside. The thin pictures can easily be cut with a sharp craft knife. Once attached, they seem to have a tendency to wrinkle, but after careful pressing they fit the surface perfectly. The hobbyist needs more dexterity and delicate tools when attaching the tiny license plates. Finally, all that remains is to attach the wing mirrors to the driver's cab - ideally with the help of a glue stick so as not to leave any indelible marks.


Different to the flatbed
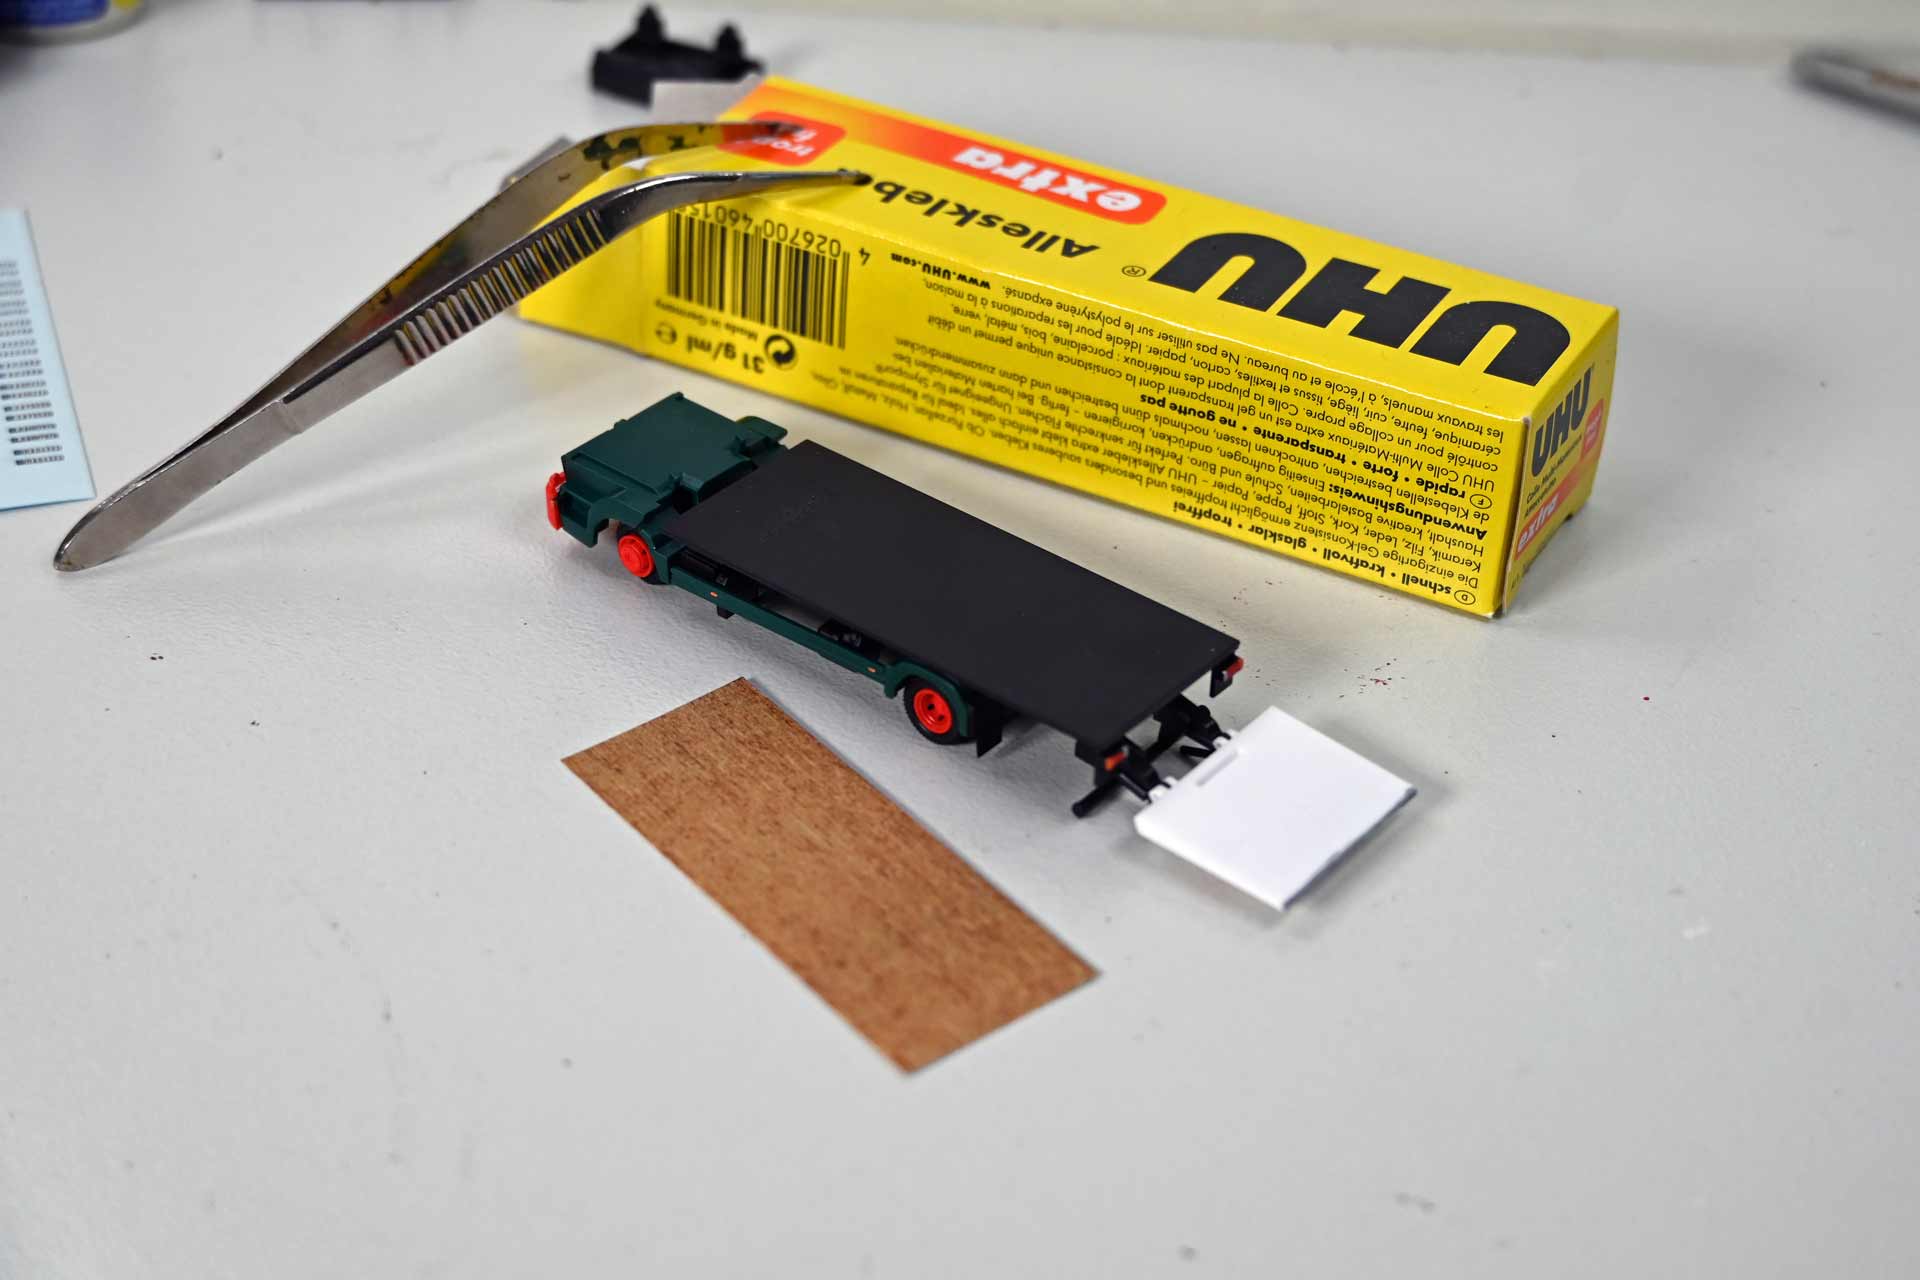
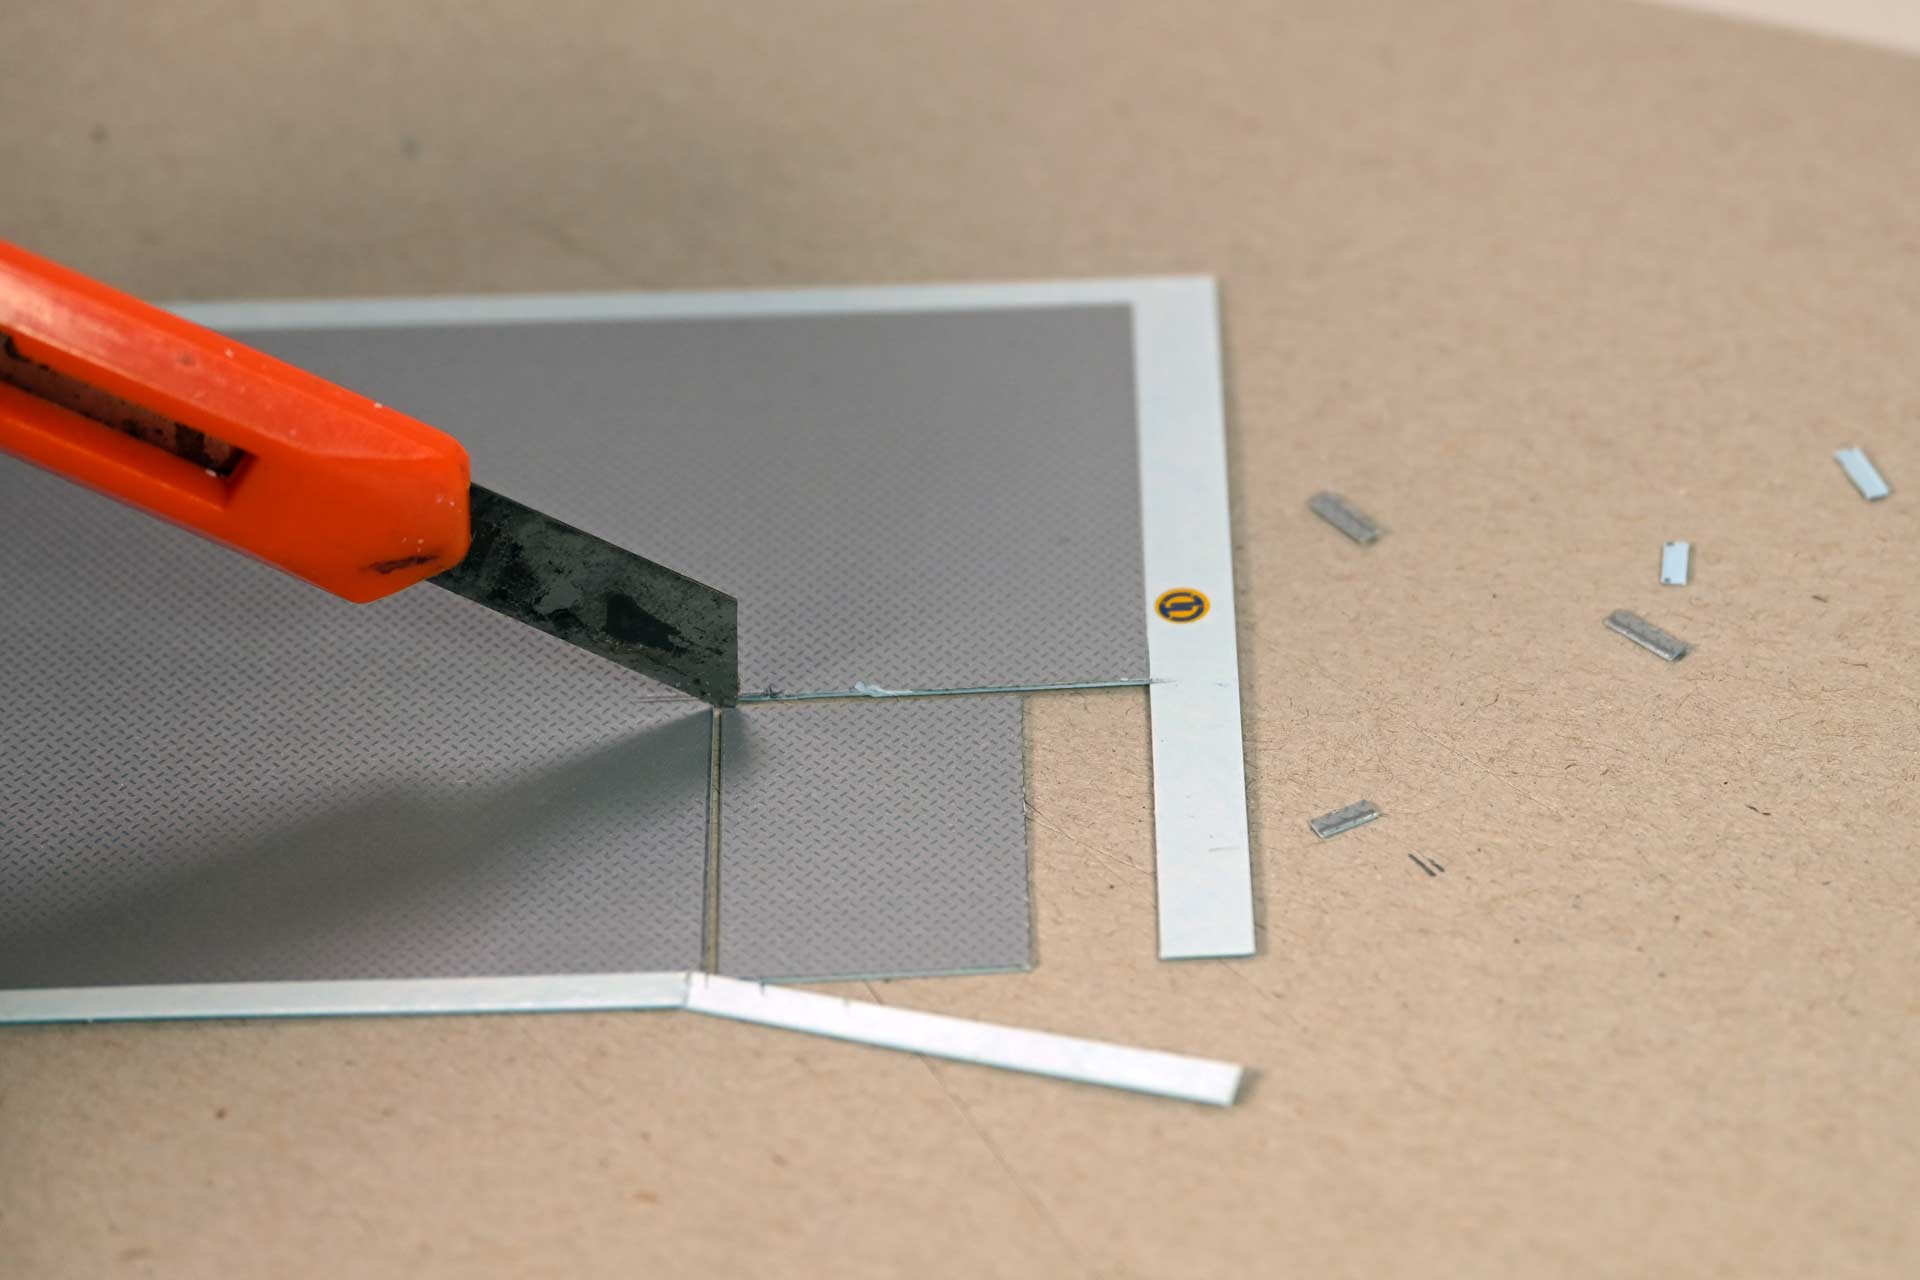
The design of the MAN TGL equipped with a flatbed and tarpaulin is slightly different. Here, too, the loading area is covered with an imitation wood veneer, but the inner walls of the flatbed are already fitted with the familiar checker plate decals.

The imitation scaffolding under the tarpaulin is made from thin strips of wood. For this purpose, 0.5 mm wood veneer is first cut into1 mm strips. The cross slats, cut to length, are then fixed to the inside of the tarpaulin using UHU. The horizontal beams can then be fixed with a drop of white glue. In view of the rather dark tarpaulin of the model, it is sufficient to modify the interior only up to the middle of the wagon. The final touch is to reinstall the little MAN truck’s wing mirrors, meaning both models are ready for deployment.

Model making, text and pictures: Bernd Keidel
Informations
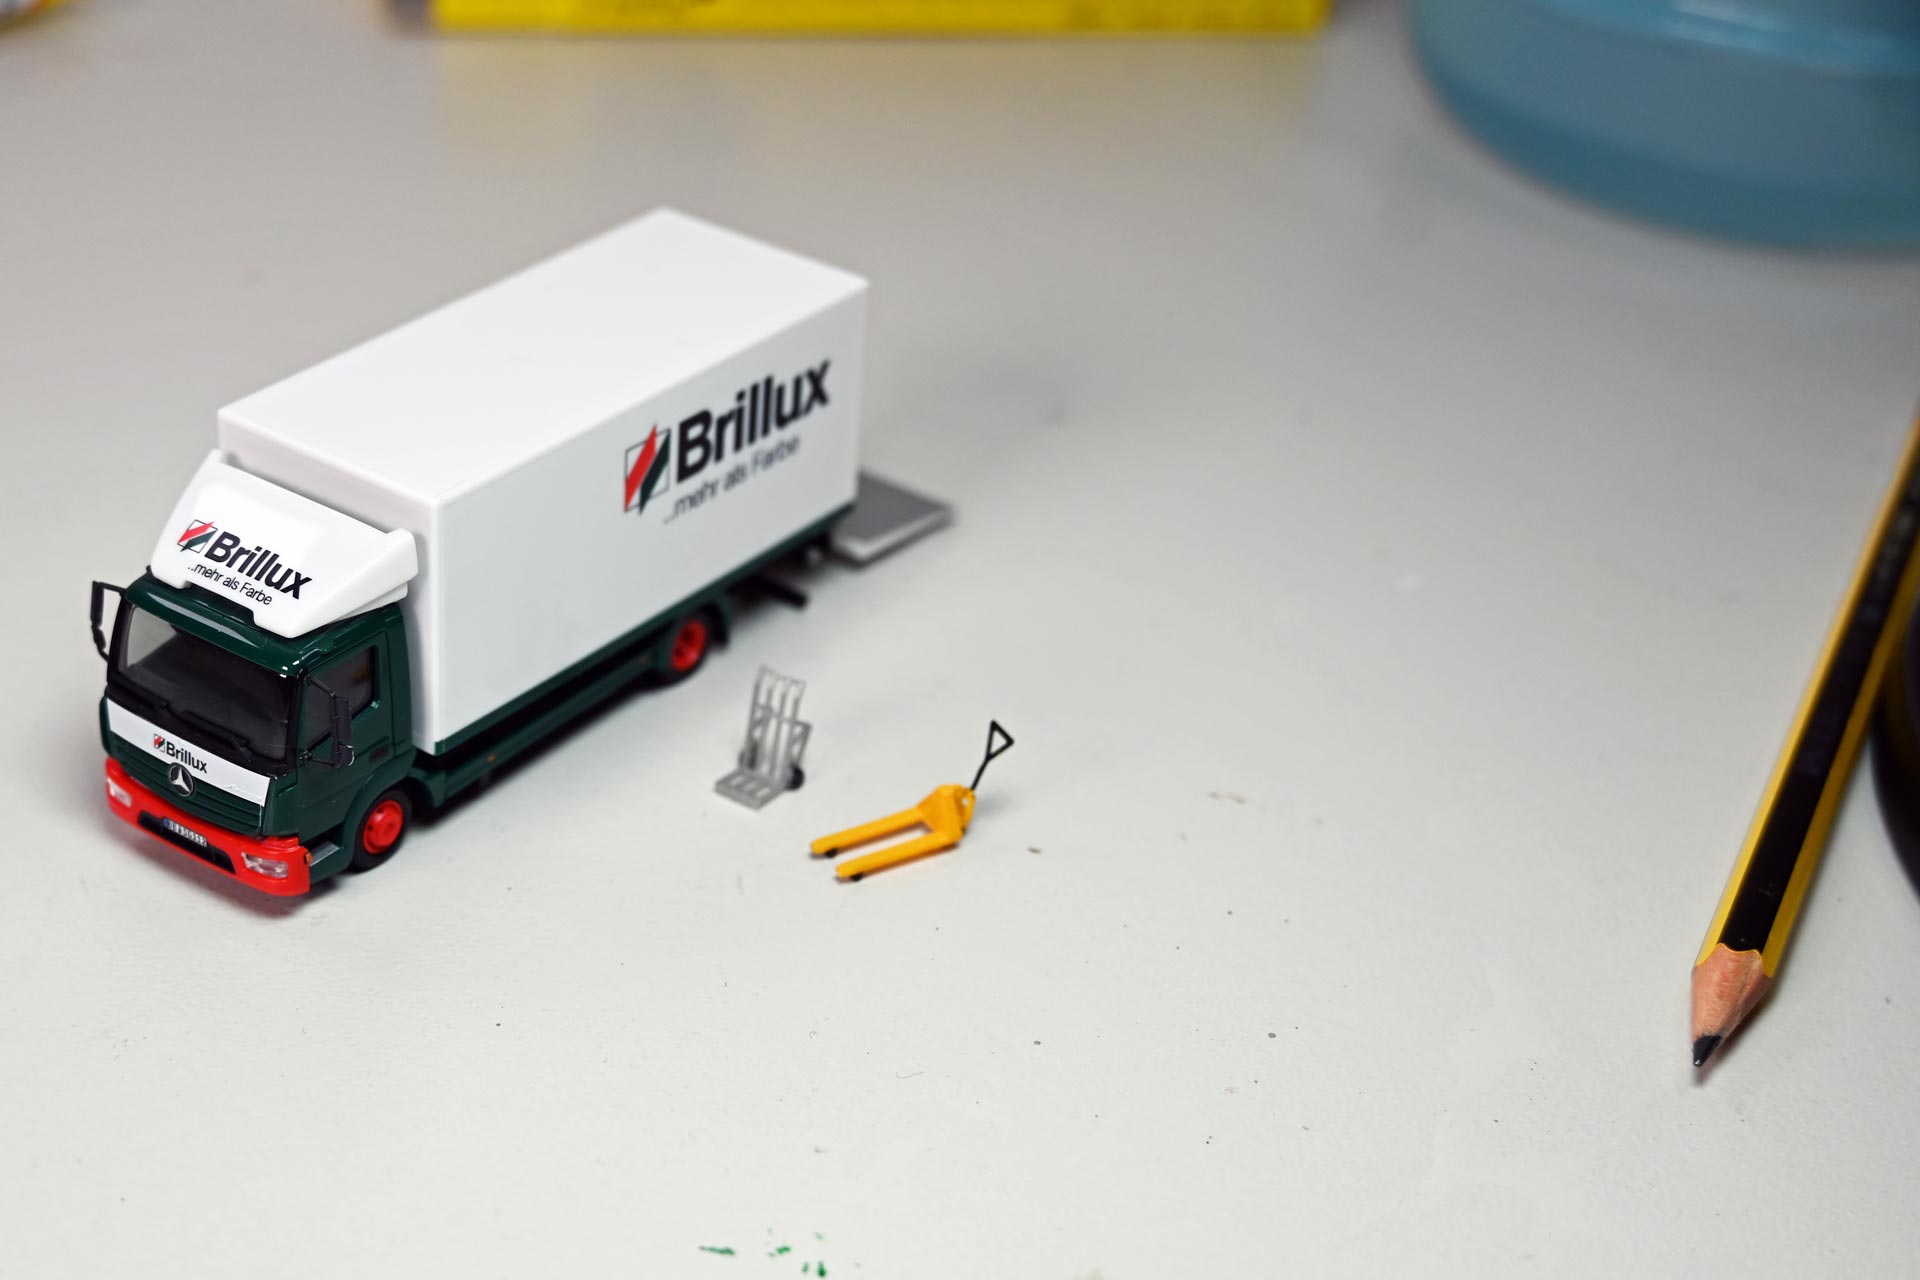
Brillux GmbH from Münster, family-owned since 1889, is one of Germany's largest producers of paints and varnishes. The secret of the Westphalian company's success is its direct line to customers in the construction industry, including free delivery to the building site. The company also operates its own fleet of trucks for this purpose.
The British company Wincanton was one of the largest logistics service providers in Europe until 2007, since when numerous divisions have been sold off. A large part of the European business was transferred to Rhenus Logistics in 2011.
Materials used:
• Thin brush (strength 00)
• Tweezers
• Cutter/wallpaper knife
• Uhu all-purpose glue
• various paints (Revell 30, 90, 330)
• TL decal sheet Krähenfuss 1-fold 1:87 item number: 1310
• License plates (e.g. TL decals)


